How do I export metafields to a CSV file?
Intro
In this tutorial, you will learn about data exports and their real-world applications.
The most common use cases include, but are not limited to:
- exporting data from one Shopify store to have it imported to another Shopify store (see how to migrate metafields between stores);
- exporting data to a CSV file to have it edited in a spreadsheet editor and imported back to update the data;
- generating template files for future data import tasks (see how to prepare a CSV file for import);
- creating a backup copy of existing metafields.
Accessing the data export menu
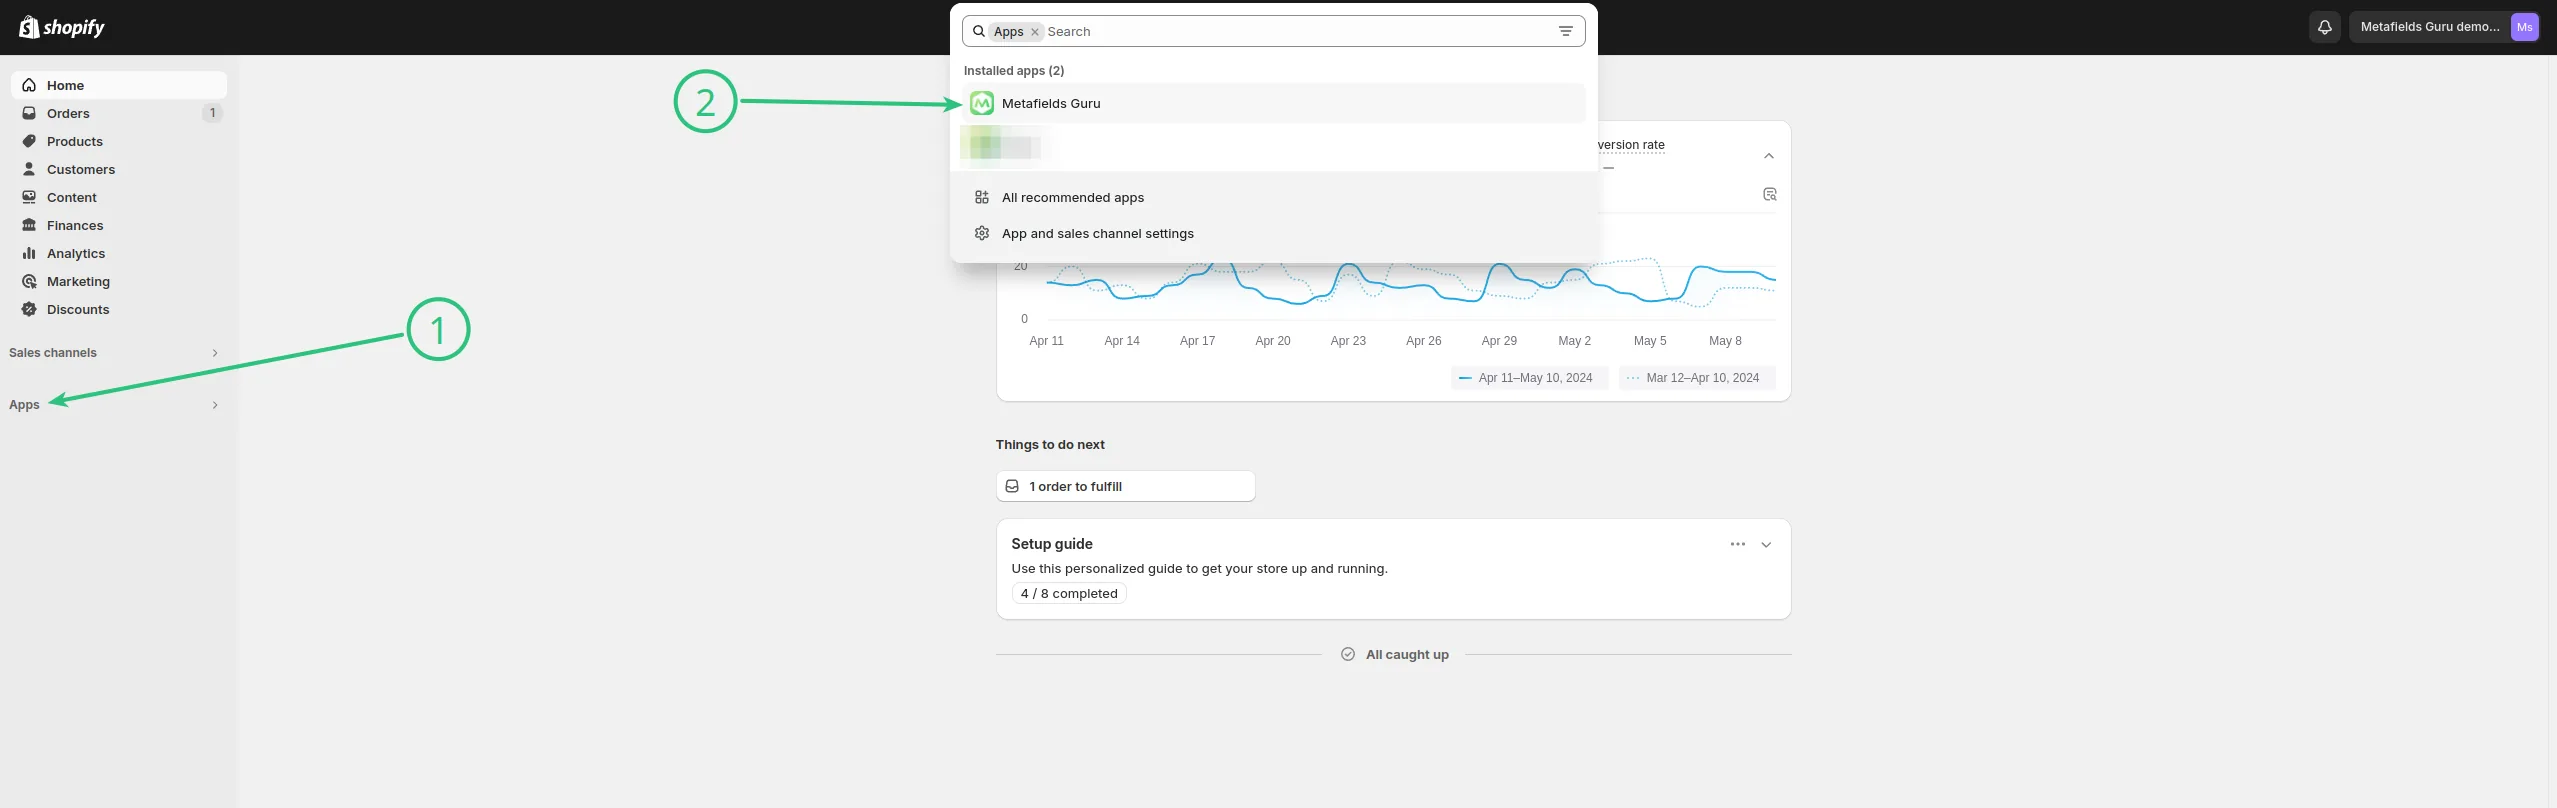
Go to the Apps section of your Shopify admin panel (1) and select our app from the list of installed apps (2):
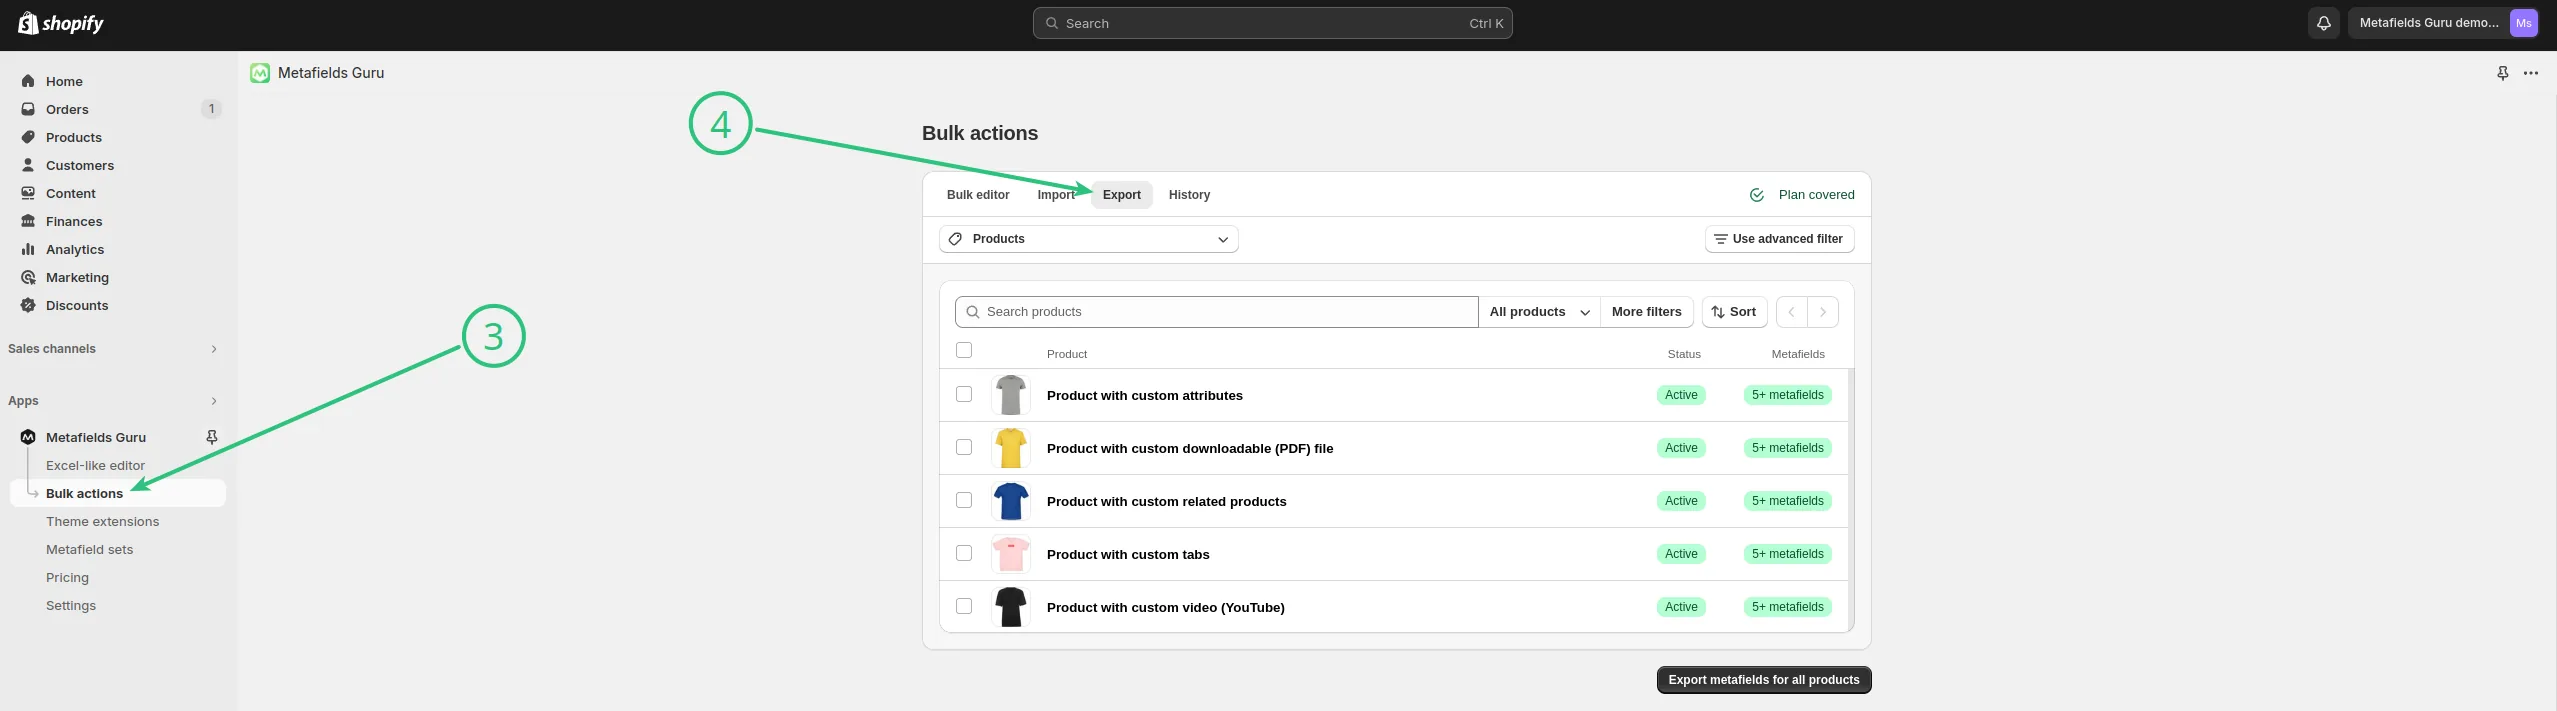
Next, navigate to the Bulk Actions tab of our menu (3) and go to Export (4):
Data filtering system
The data filtering system is the same as that used in the bulk editor (click here to learn more). If you are not familiar with it yet, you should take a short break here and learn more about the filters available in our app. They are a great tool for precise and fast data management, so visiting this link is the time well spent.
Configuring a data export task
Selecting the CSV file format
Before you proceed with a further configuration, you can select the preferred format for the future export file:
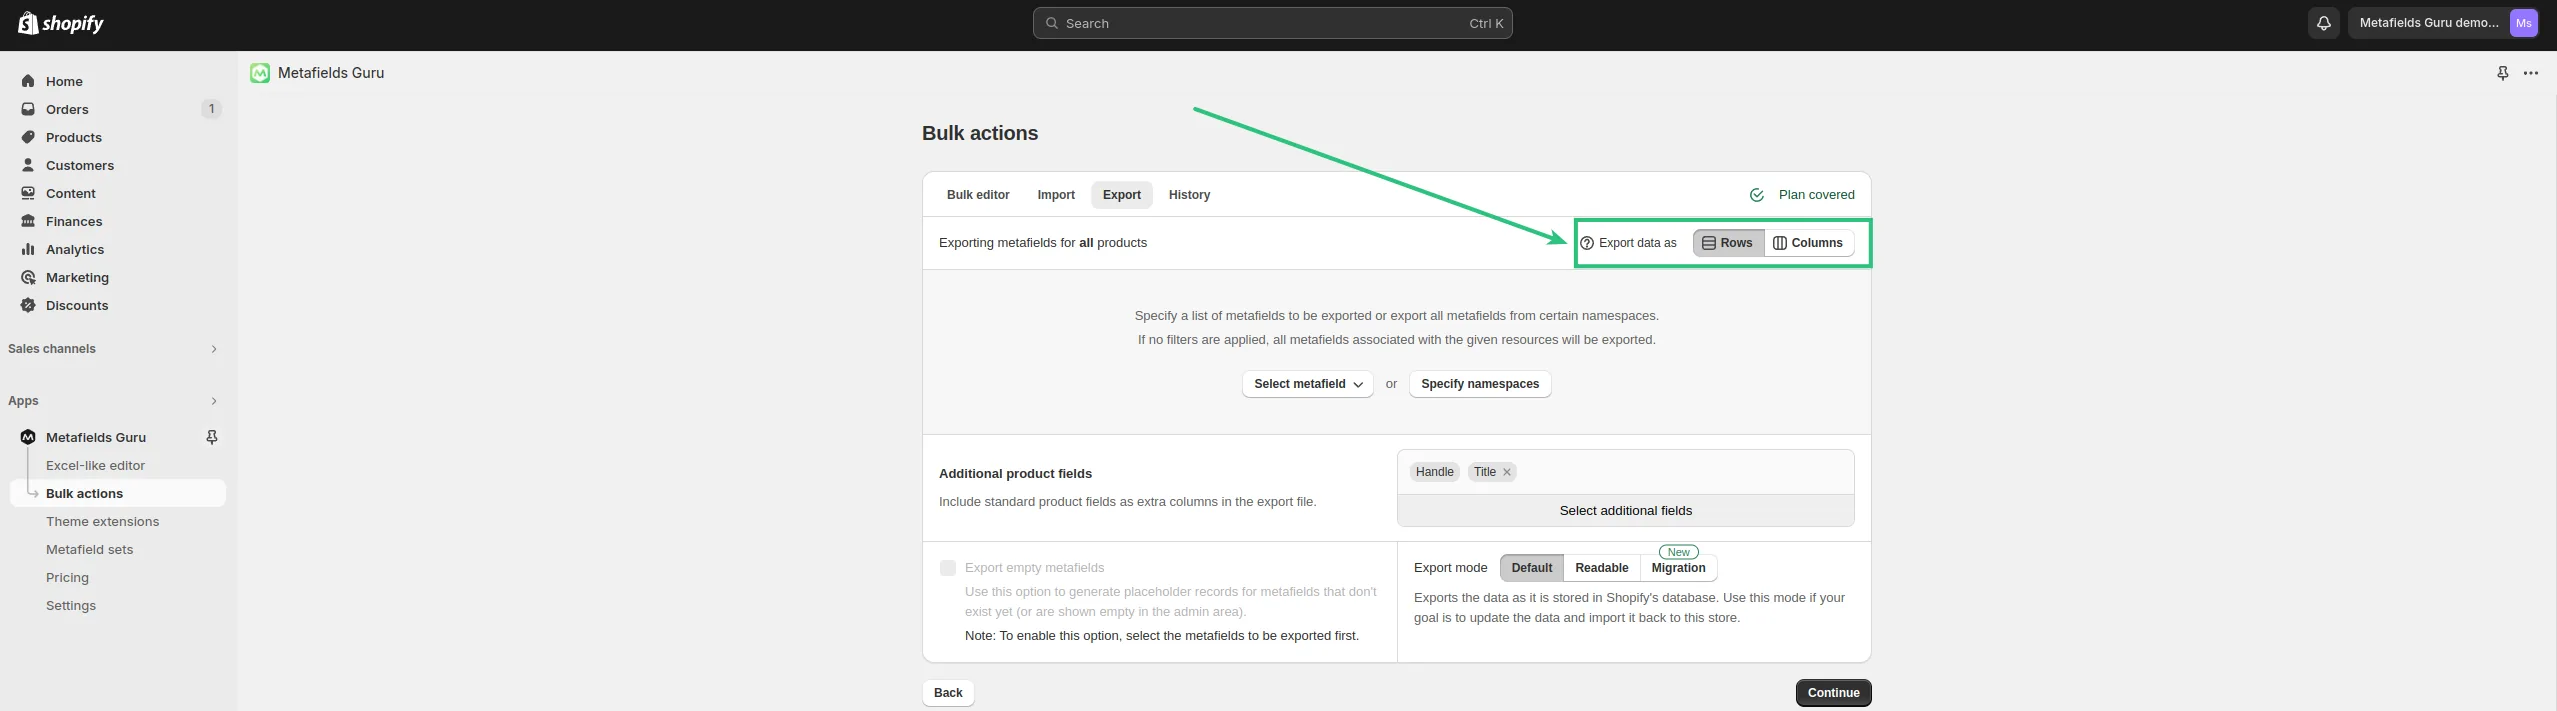
Some merchants prefer to manage spreadsheets via editors like Excel, Numbers, or Google Sheets, while others might tend to automate the process with custom tools. Hence, our app supports two different layouts of CSV files:
- human-friendly "columns";
- automation-focused "rows" that allow for better data integrity.
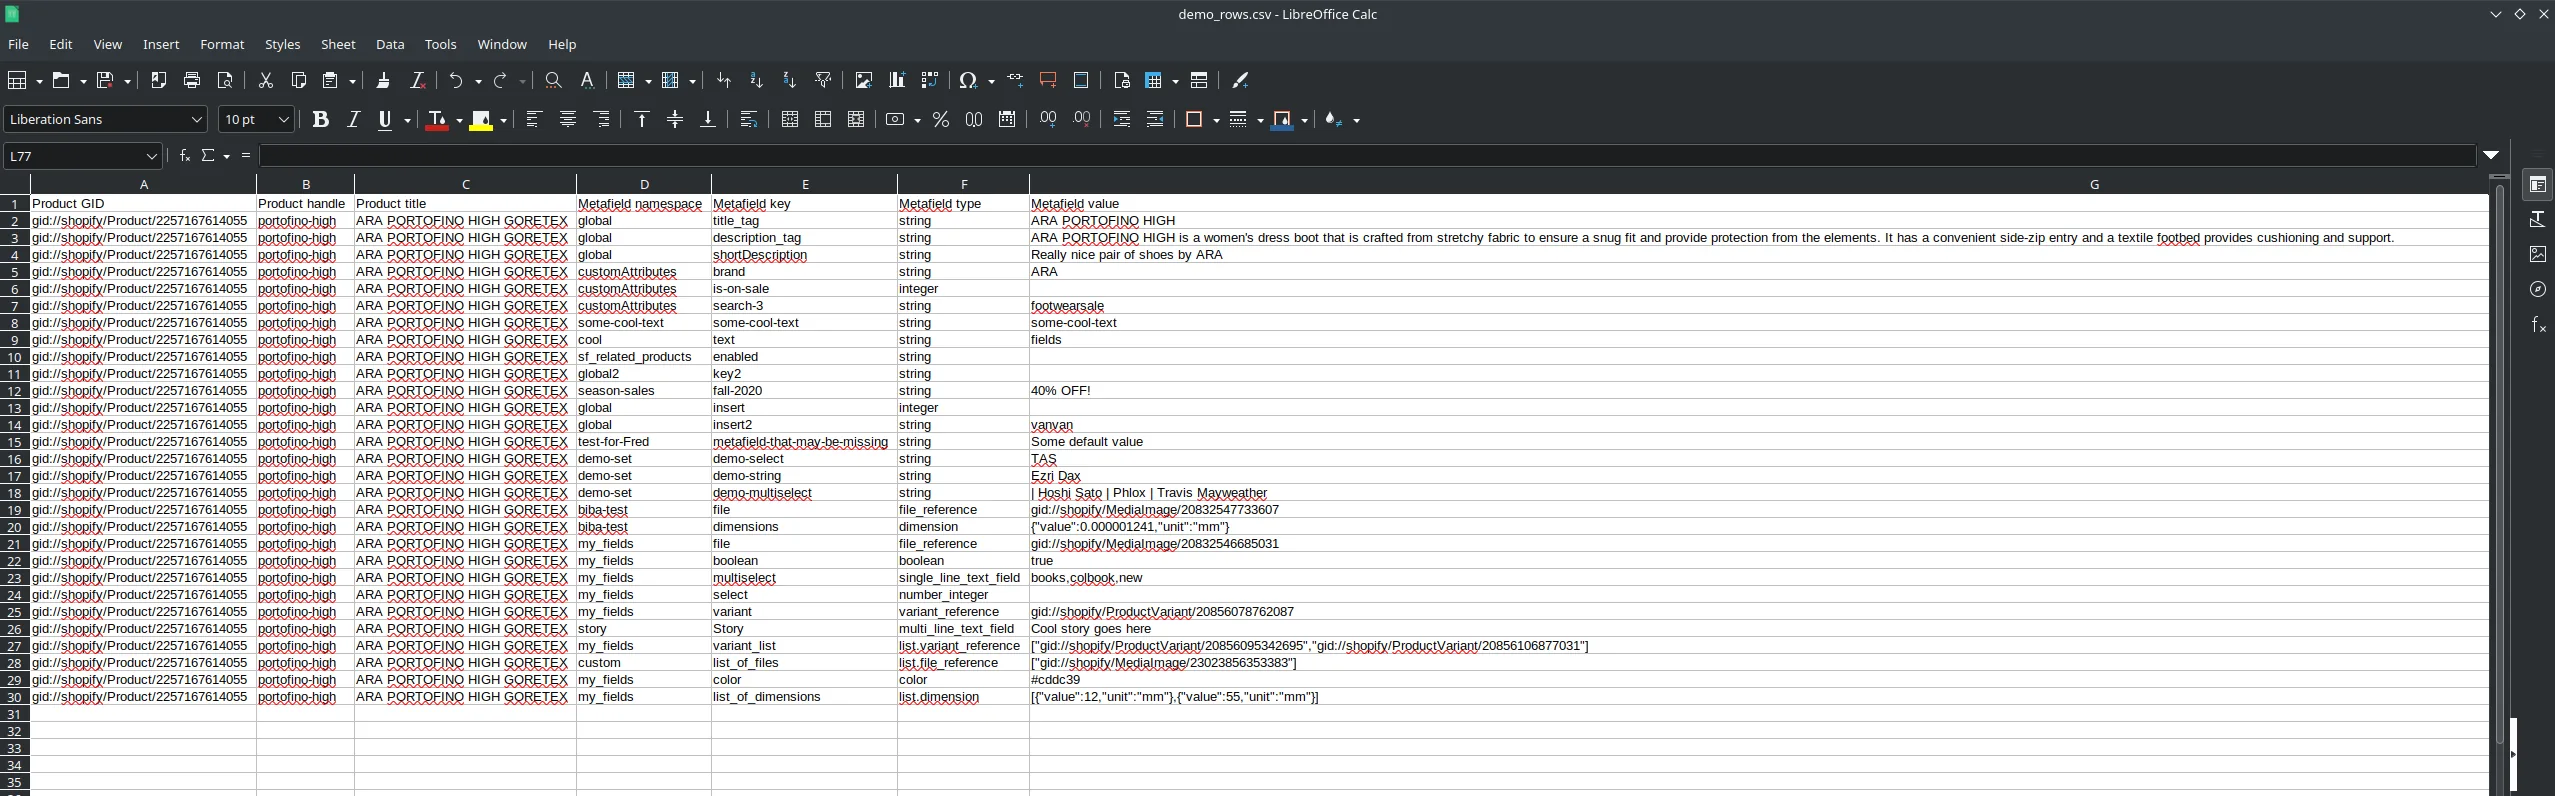
The main difference is that when metafields are exported as "columns", each resource (product, collection, etc.) is represented by a single row with separate columns for each metafield, whereas, when exported as "rows" - each metafield is represented by an individual row that contains both the metafield and the parent resource data.
Here you can see the difference the format makes for 30 metafield records:
- The rows format
- The columns format

Selecting the data to be exported
Metafields to be exported
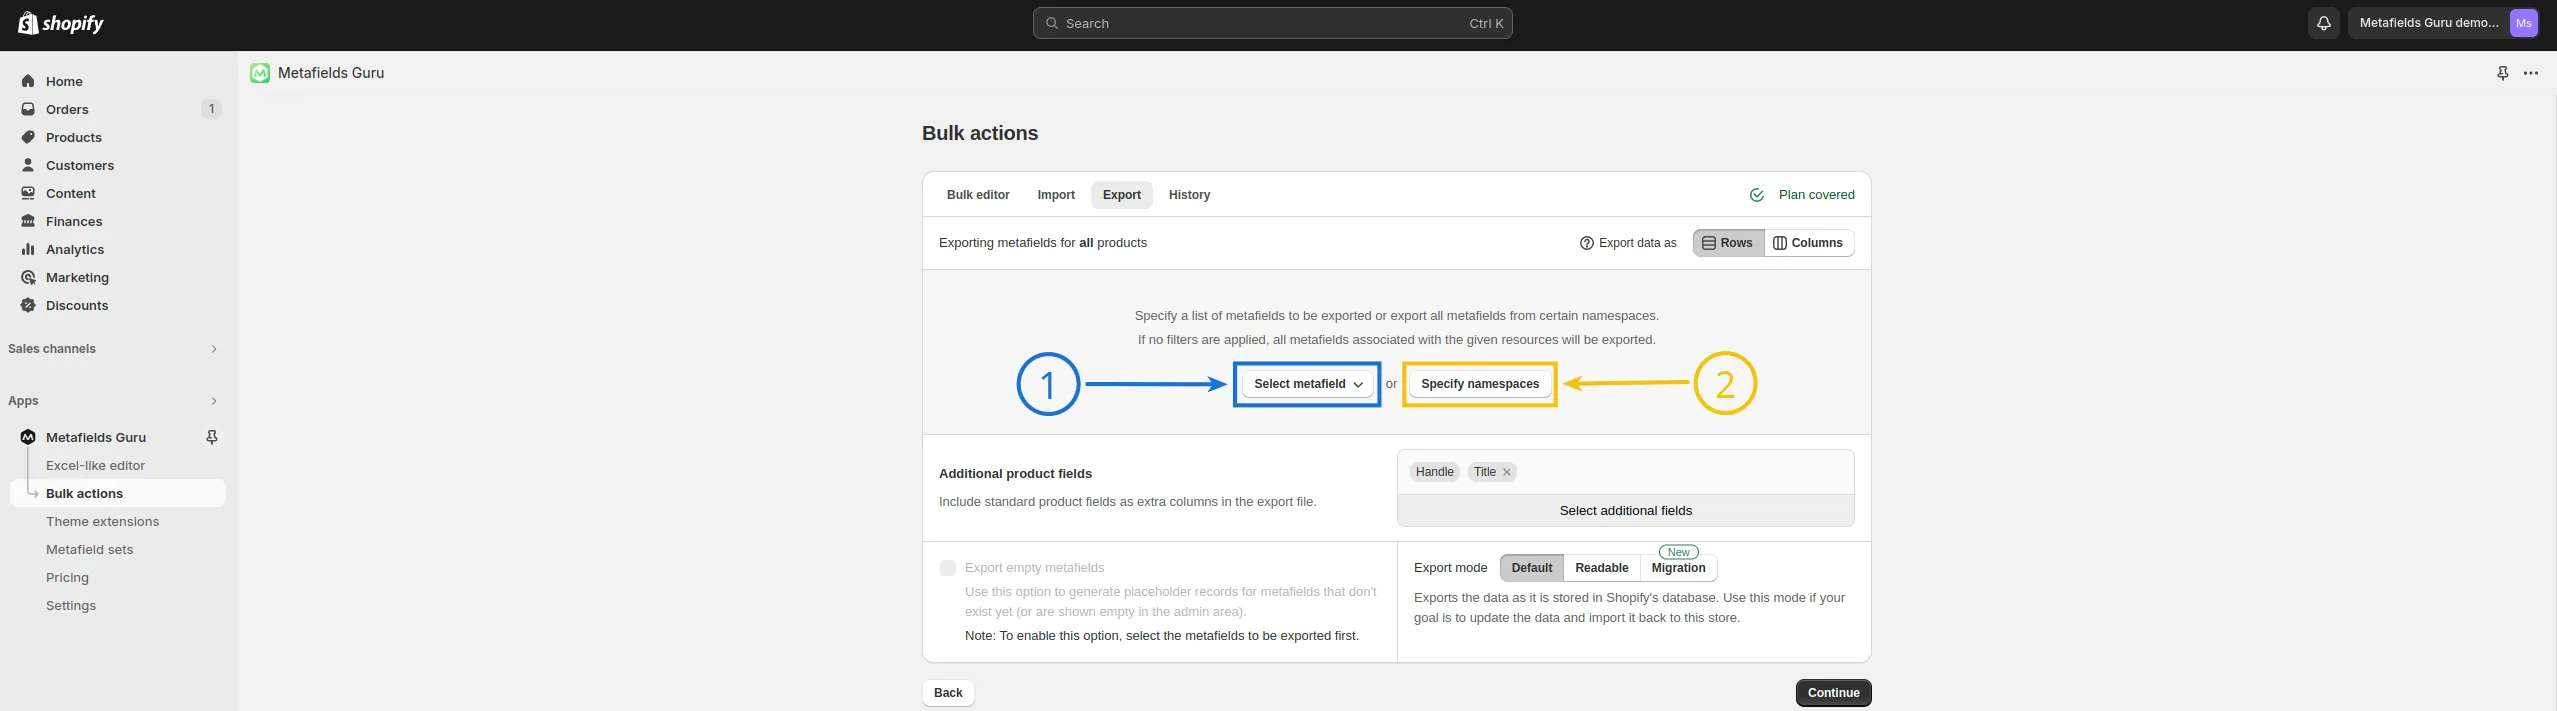
If you want to have all metafields exported to a CSV file, you should not apply additional filters. However, if you want only specific metafields to be exported, there are multiple options to make it happen. You can either specify the list of namespace/key combinations to be exported (1) or export all metafields that belong to a certain namespace (2):
Adding standard Shopify attributes to the export file
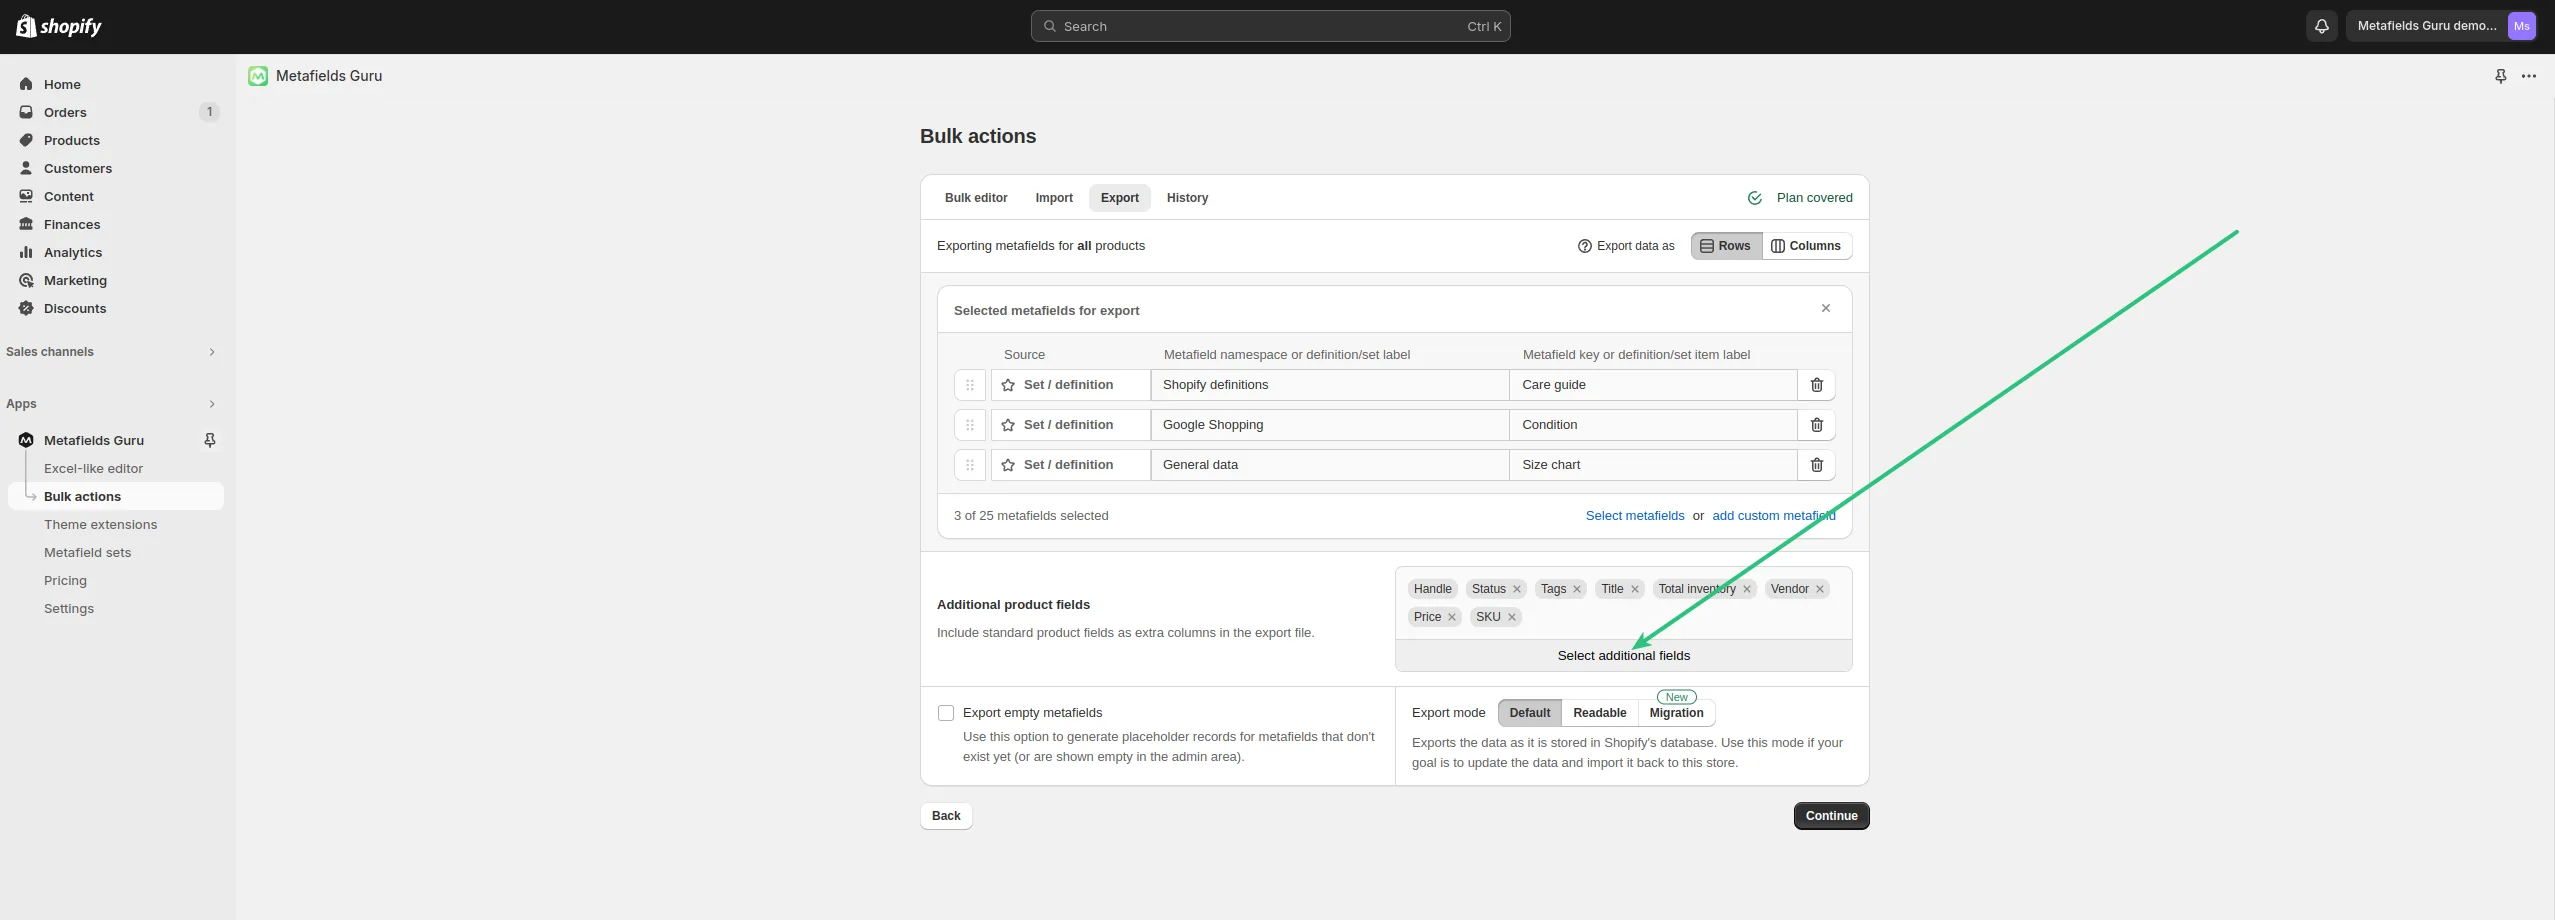
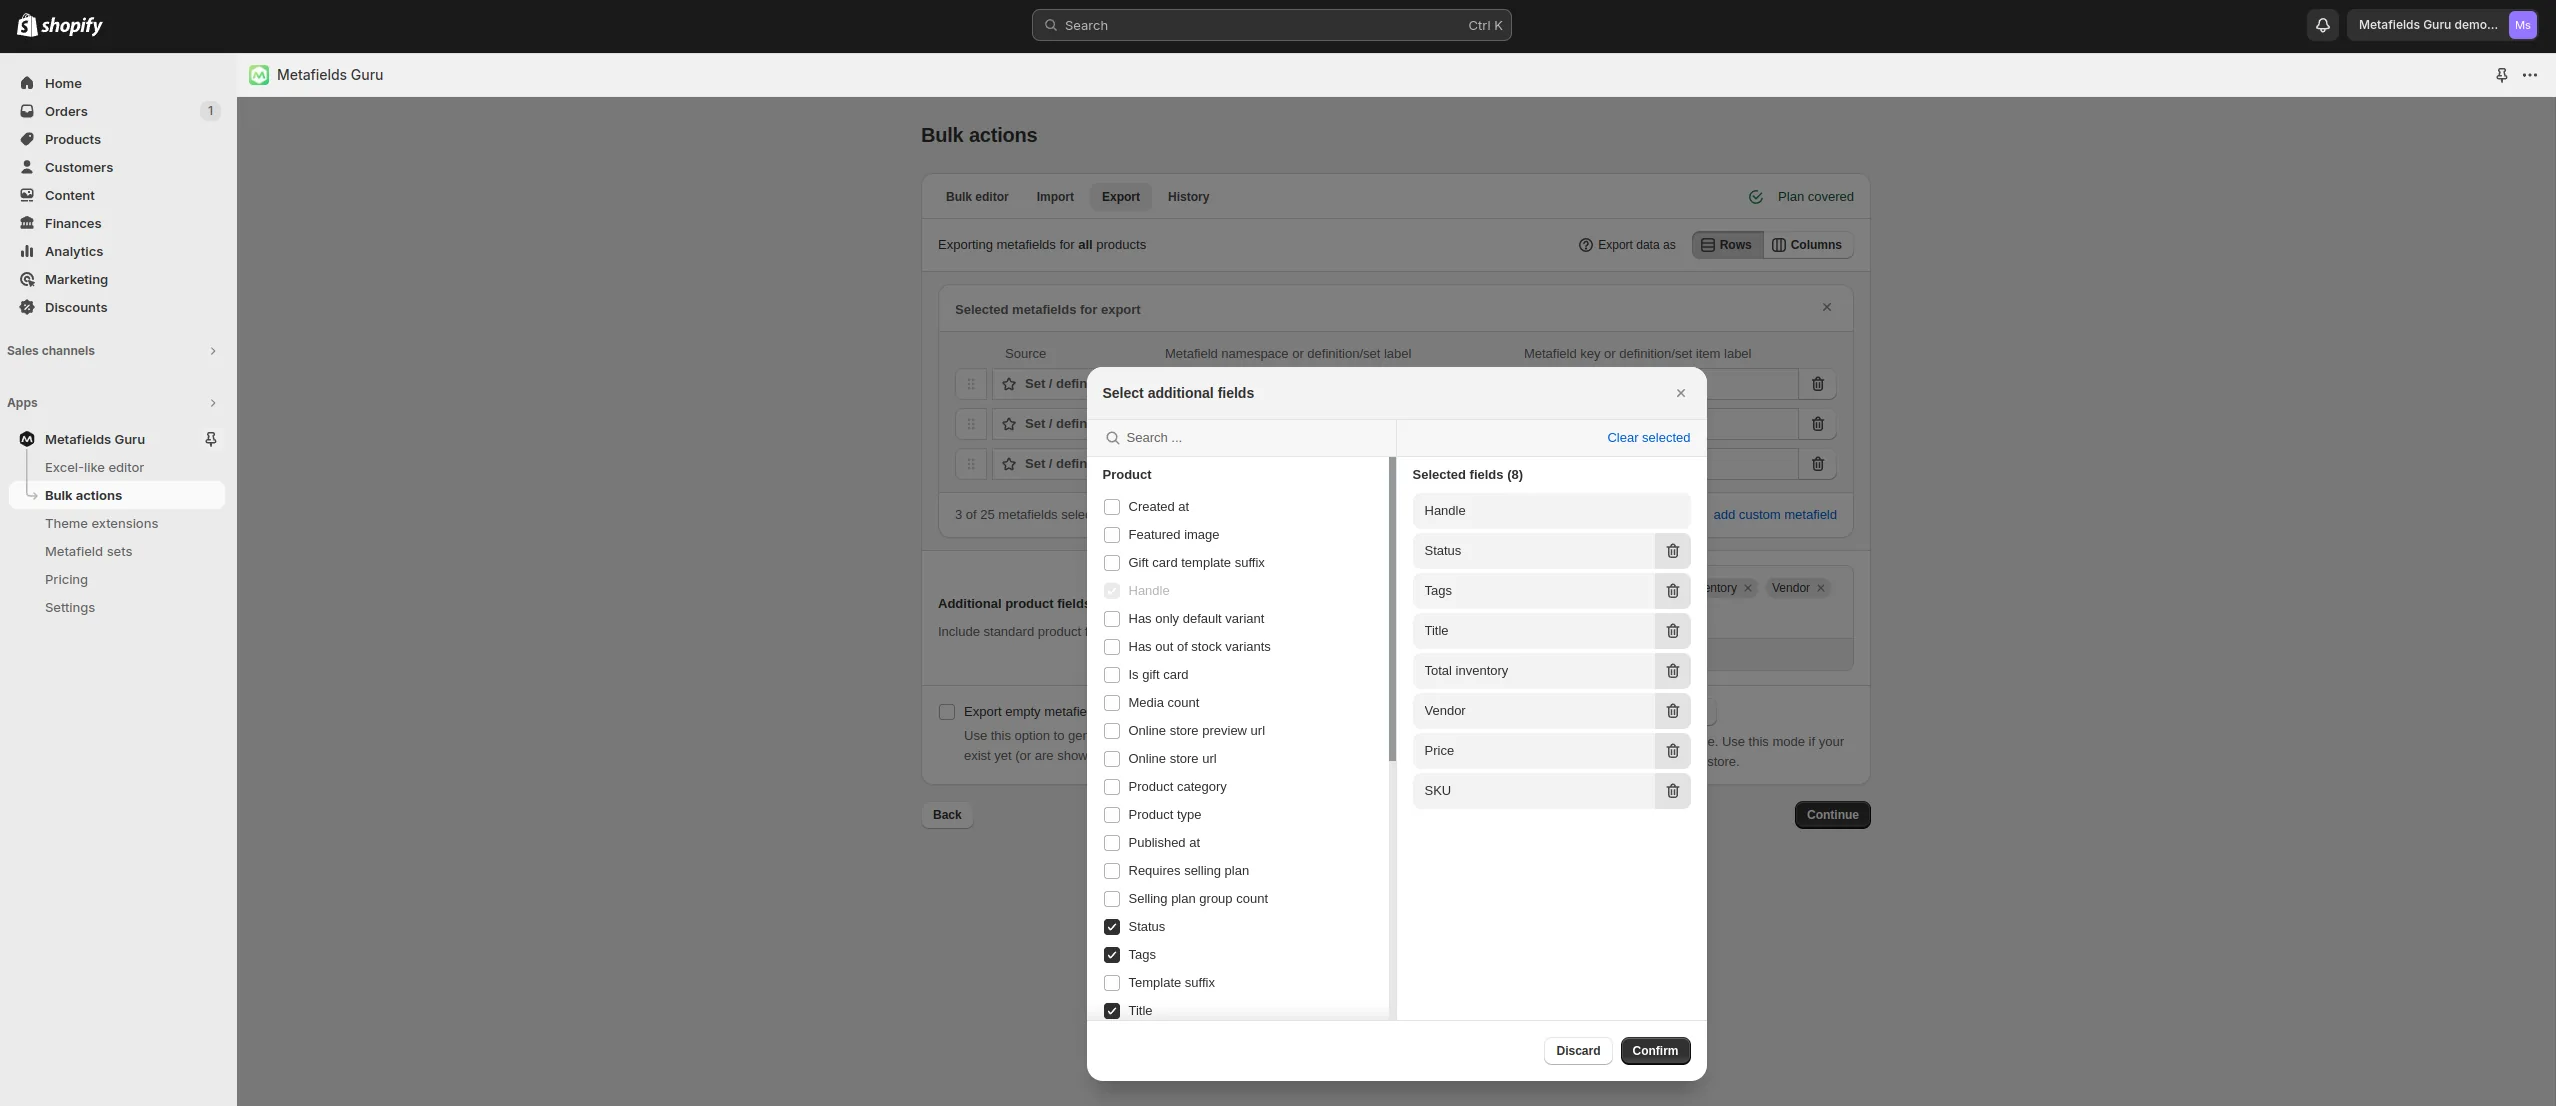
You can also select from a wide range of standard Shopify attributes to be included in the export file. Yet another great thing is that you can include the first variant data when exporting product-level metafields:
Additional options
Export empty metafields
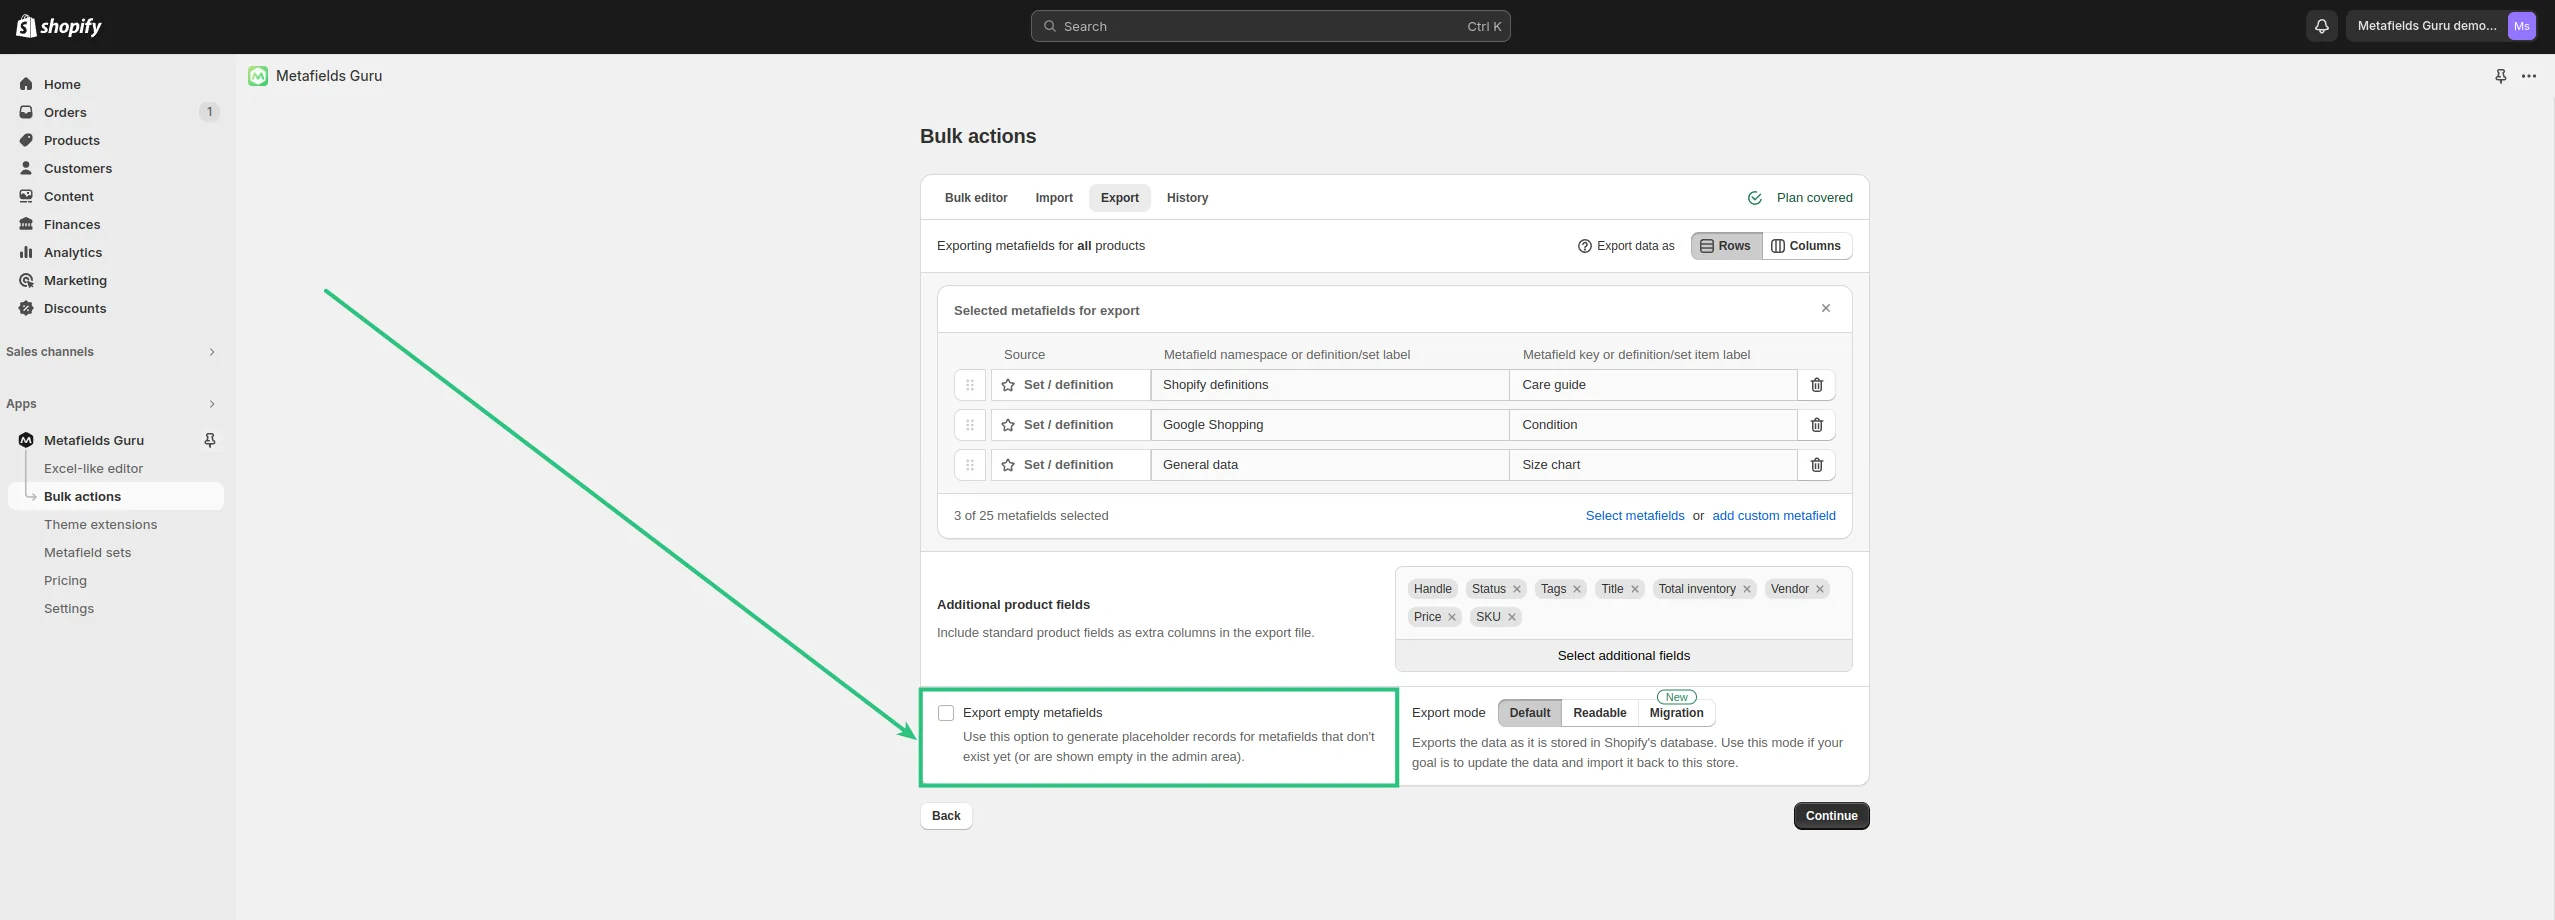
Use this option to have empty/non-existent metafields represented by placeholder records in the export file. Useful for creating template files or reports on specific metafields.
Export modes
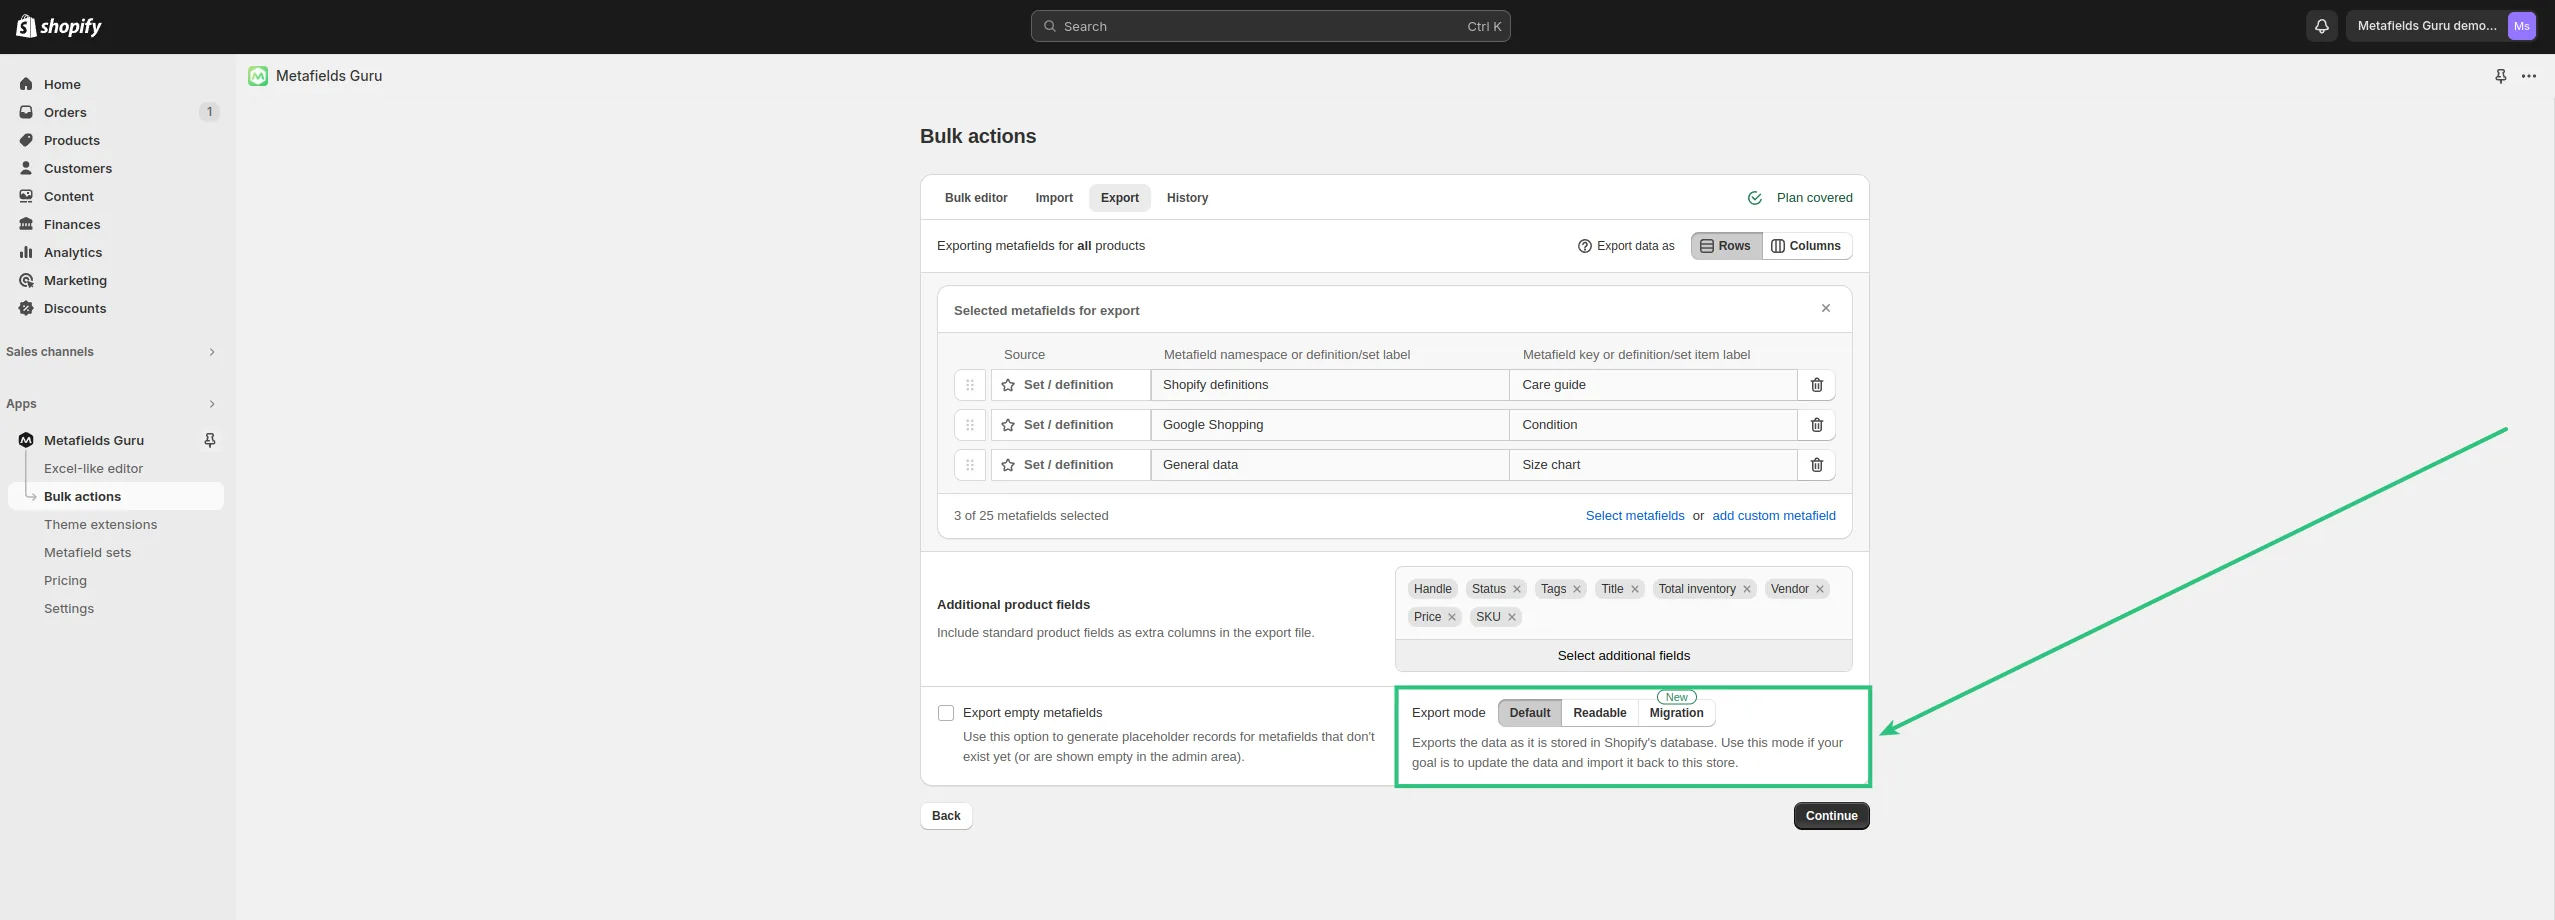
The export mode controls how metafield values are written to the file. It matters mostly for reference metafields (product_reference, metaobject_reference, file_reference, etc.), whose values Shopify stores as GIDs such as gid://shopify/Product/8123456789.
Default mode
Values are exported exactly as they are stored in Shopify, including the GIDs in reference metafields. Use this mode if you plan to edit the data and import it back into the same store.
Readable mode
Values of complex metafield types (references, lists, etc.) are converted into a human-readable form: product titles instead of product GIDs, file URLs instead of file GIDs, and so on. Use this mode for reports and reviewing data.
- In the "rows" format, the readable value is added as an extra column next to the original value, so the file can still be imported - just map the original value column during the import, not the readable one.
- In the "columns" format, the readable values replace the original values, so the file can't be used for imports.
Migration mode
GIDs in reference metafields are replaced with secondary identifiers that are the same in every store: product, collection, page, and article handles, variant SKUs, metaobject type/handle pairs, customer emails, company and order names, and file URLs. All other values are exported unchanged. On import, the app looks up these identifiers in the target store and converts them back to valid GIDs.
Use this mode to copy metafields from one Shopify store to another, for example from a development store to production. GIDs differ between stores, so a reference exported in the Default mode would point to a resource that doesn't exist in the target store.
See How to migrate metafields between Shopify stores for the full list of identifiers, the steps to prepare the target store, and limitations.
Downloading the results
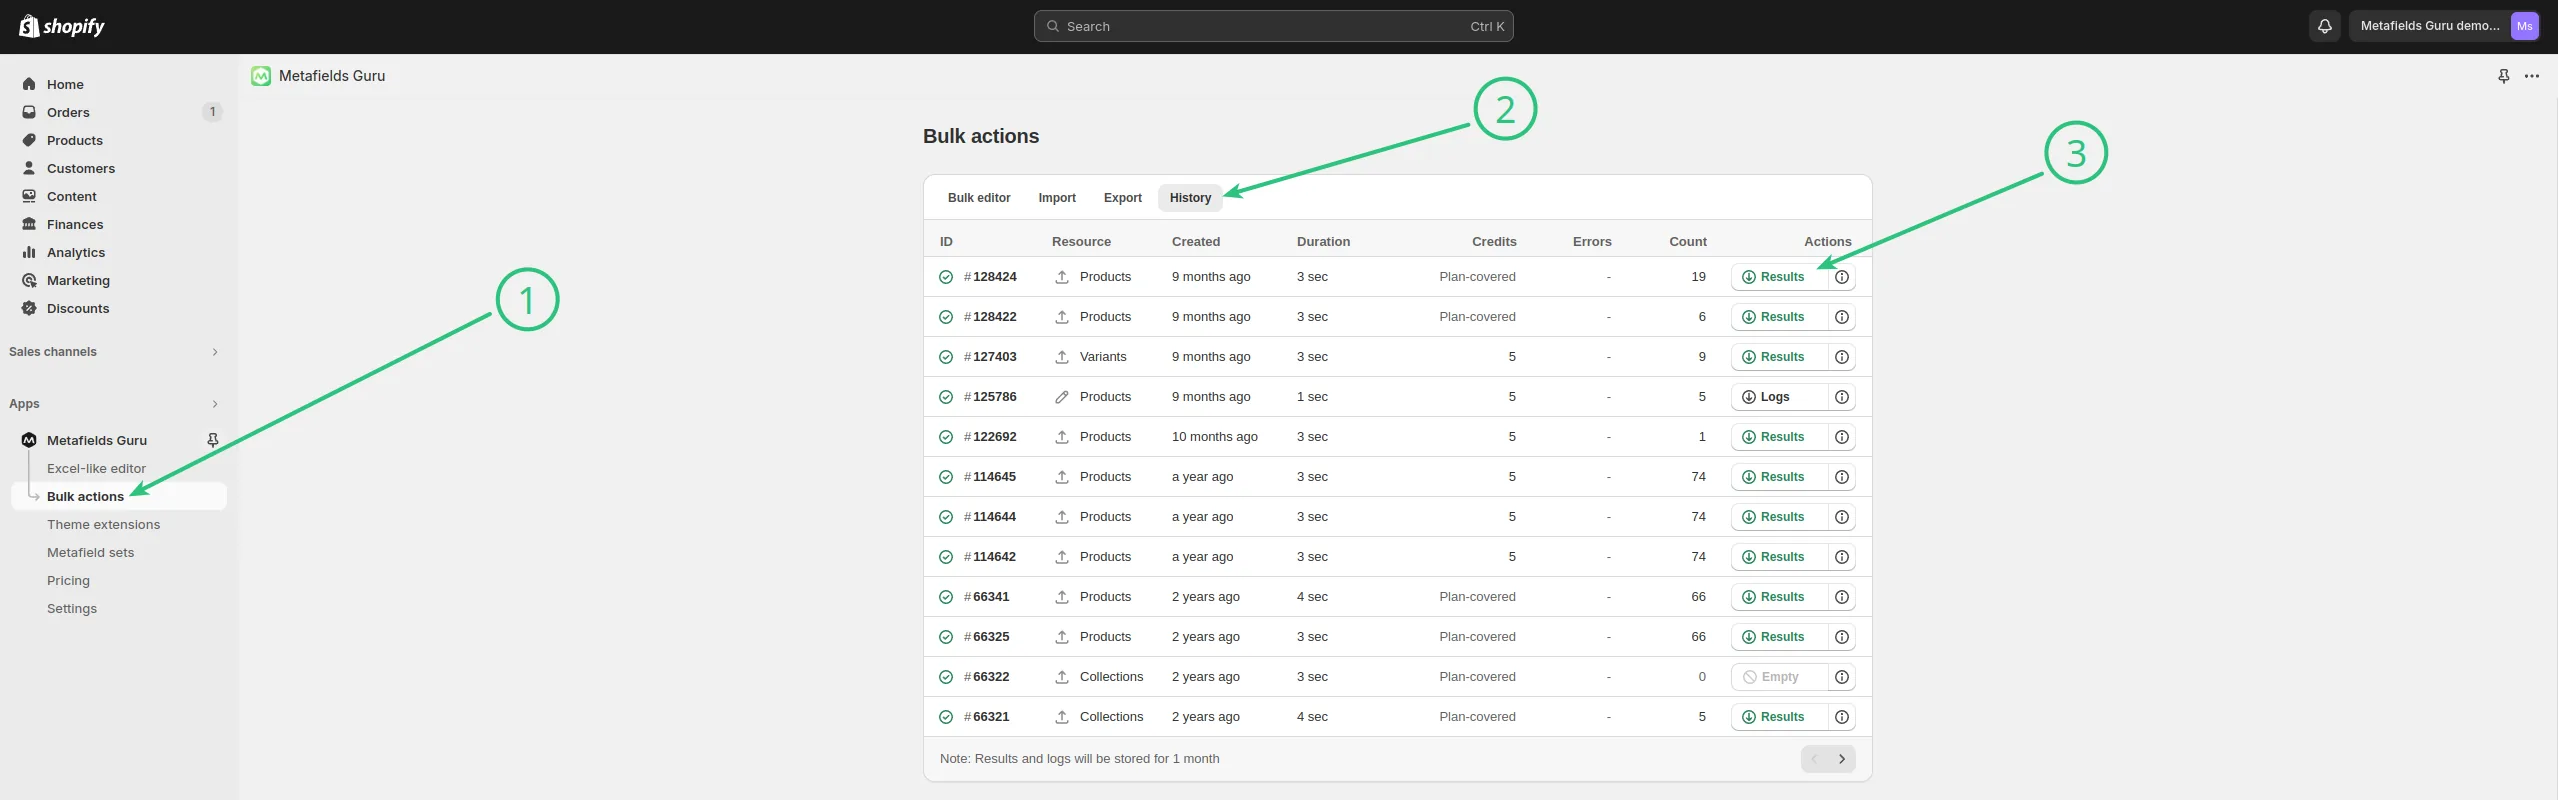
Navigate to the History tab of the Bulk Actions menu, find the export task you are interested in, and click on the Results button next to it: