How to add product attributes with metafields
This is an advanced tutorial and is not supported by Shopify. This tutorial has been verified to work with the Debut theme only. You can try to implement this on your theme, but keep in mind that it may not function. Knowledge of technologies such as HTML, CSS, JavaScript, and Shopify Liquid is required. We suggest hiring a Shopify Expert if you are not comfortable proceeding with the following tutorial.
Once you have completed the steps in this tutorial, the custom attributes of your products will appear as a custom block at the product page.
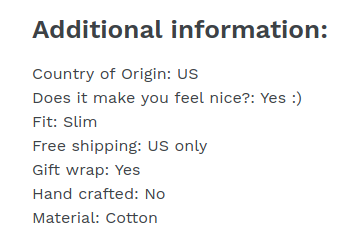
Check out this demo product to see the tutorial result in action.
Step 1. Create a new Shopify Liquid snippet called custom-attributes.liquid
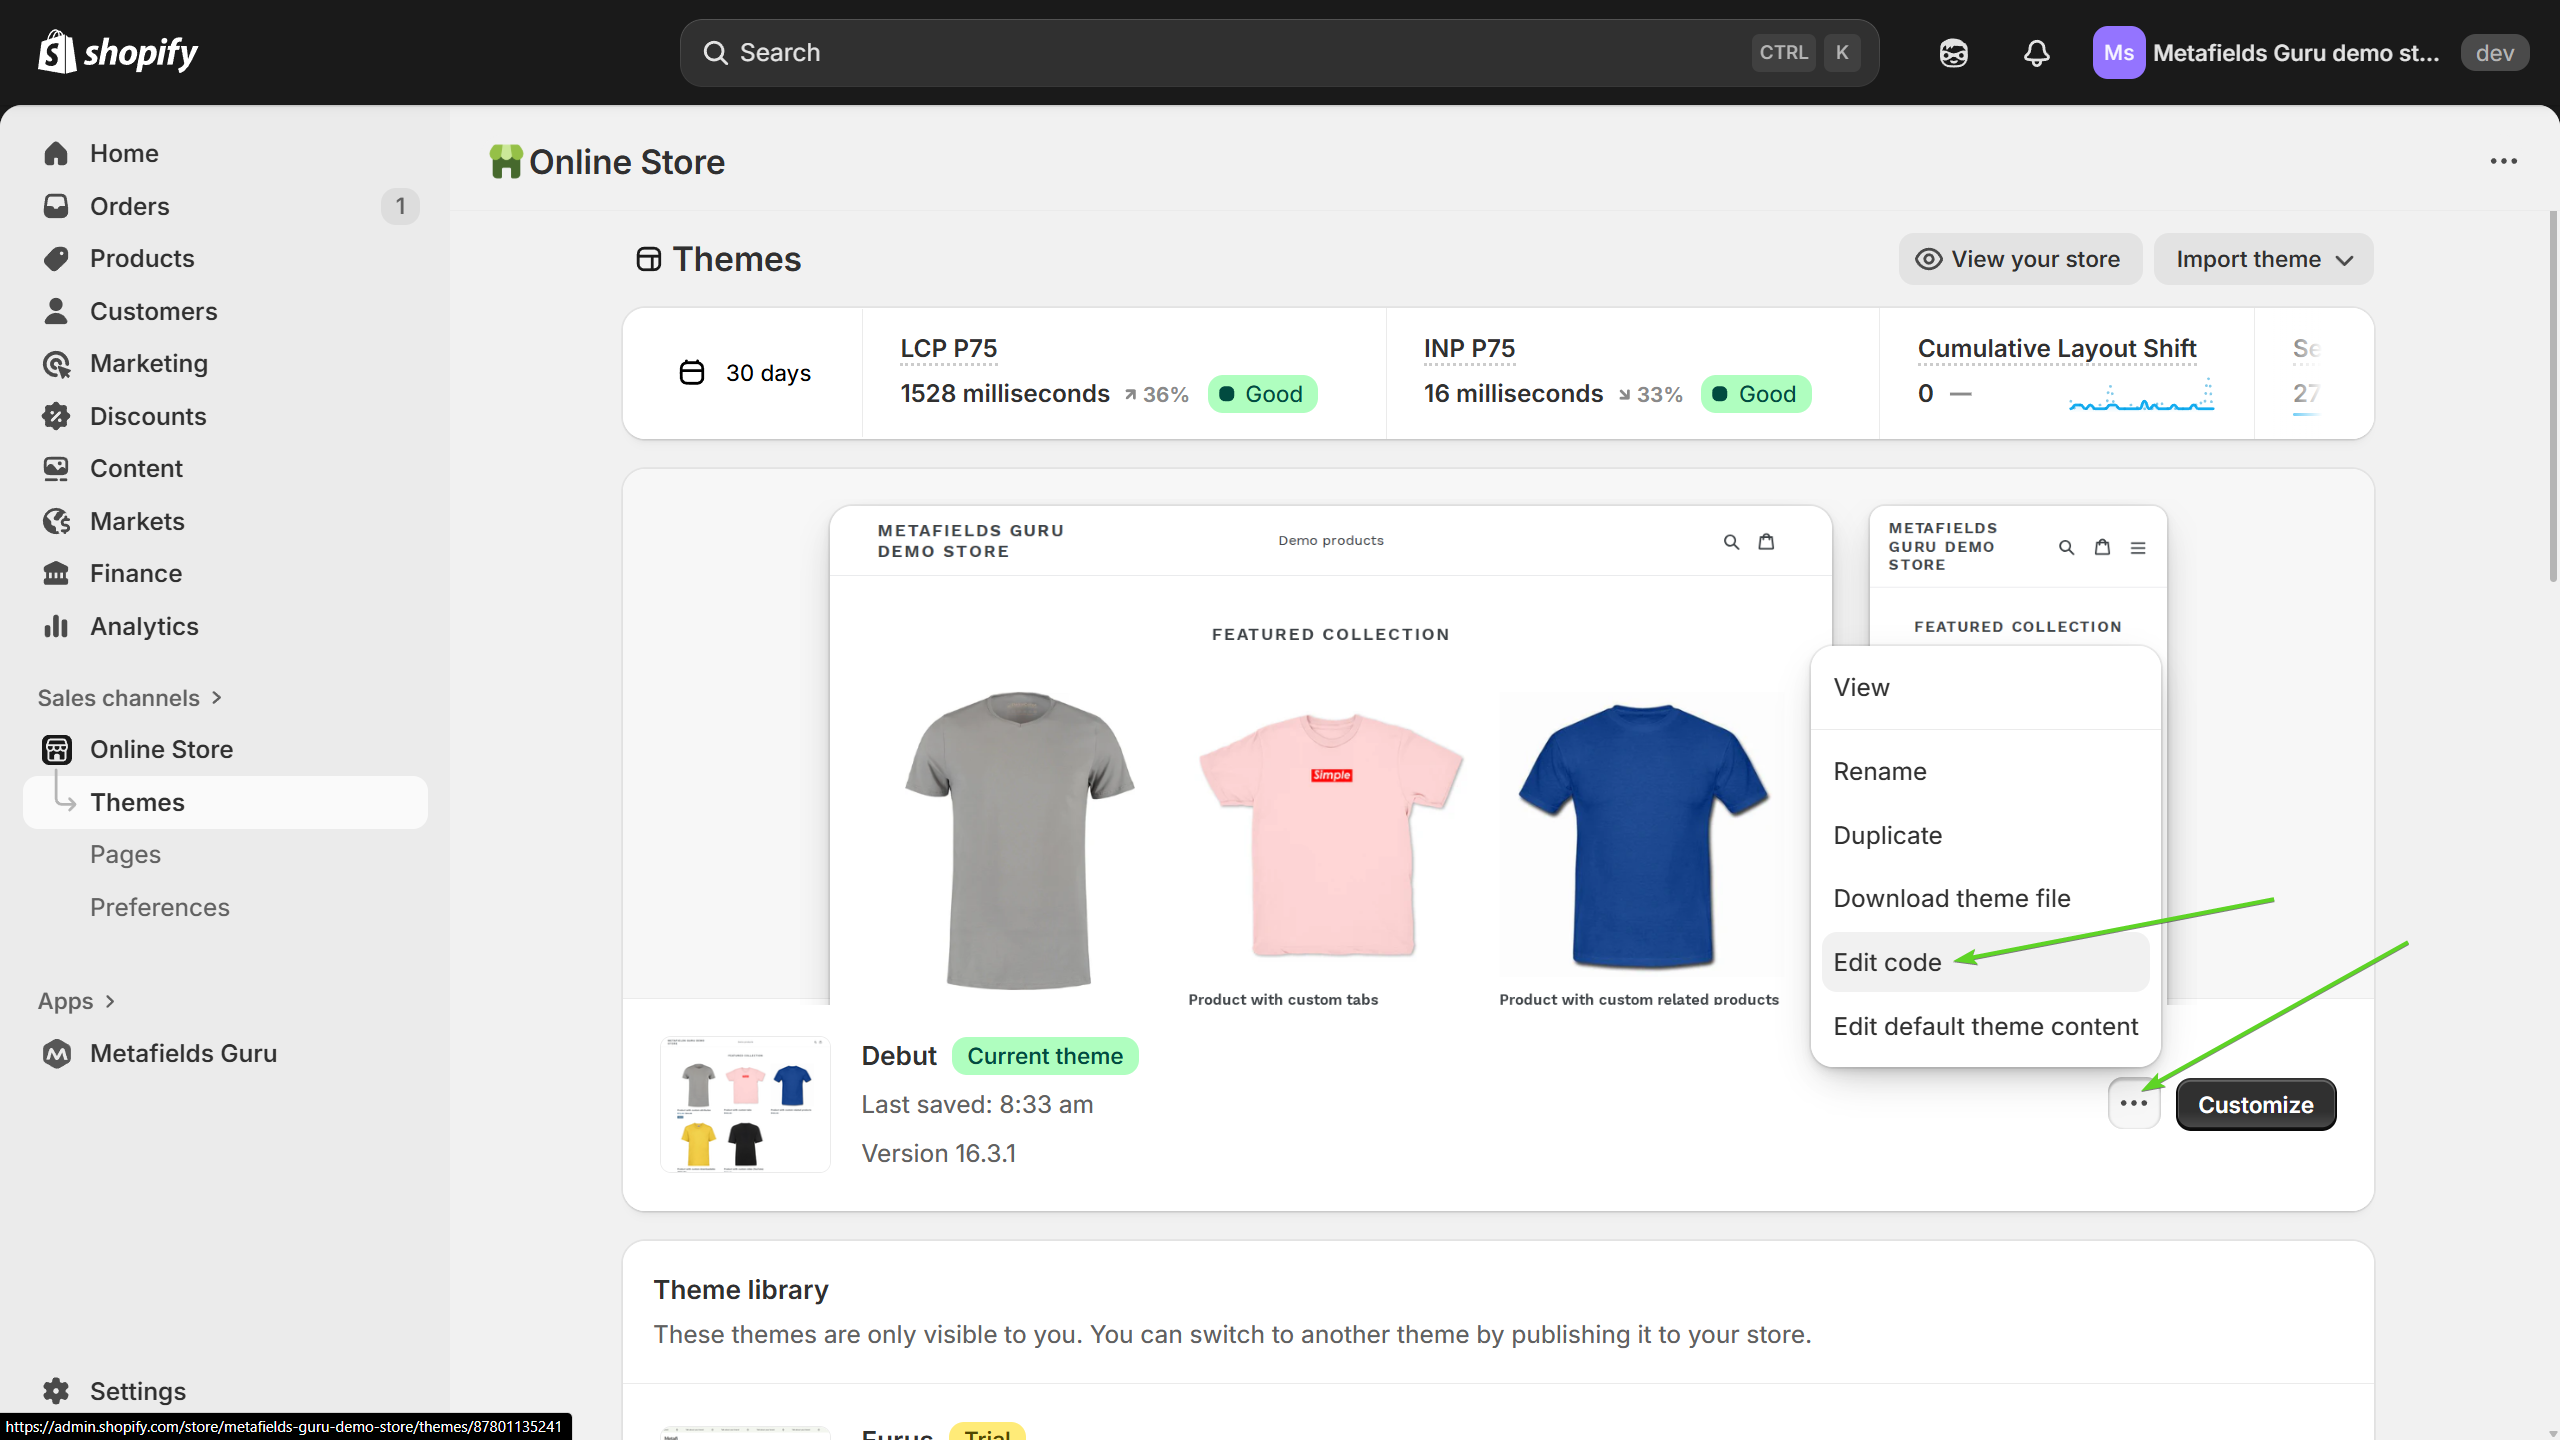
- From your Shopify admin, go to Online Store > Themes.

- Find your current theme (or the theme you want to edit) and then click Actions > Edit code.
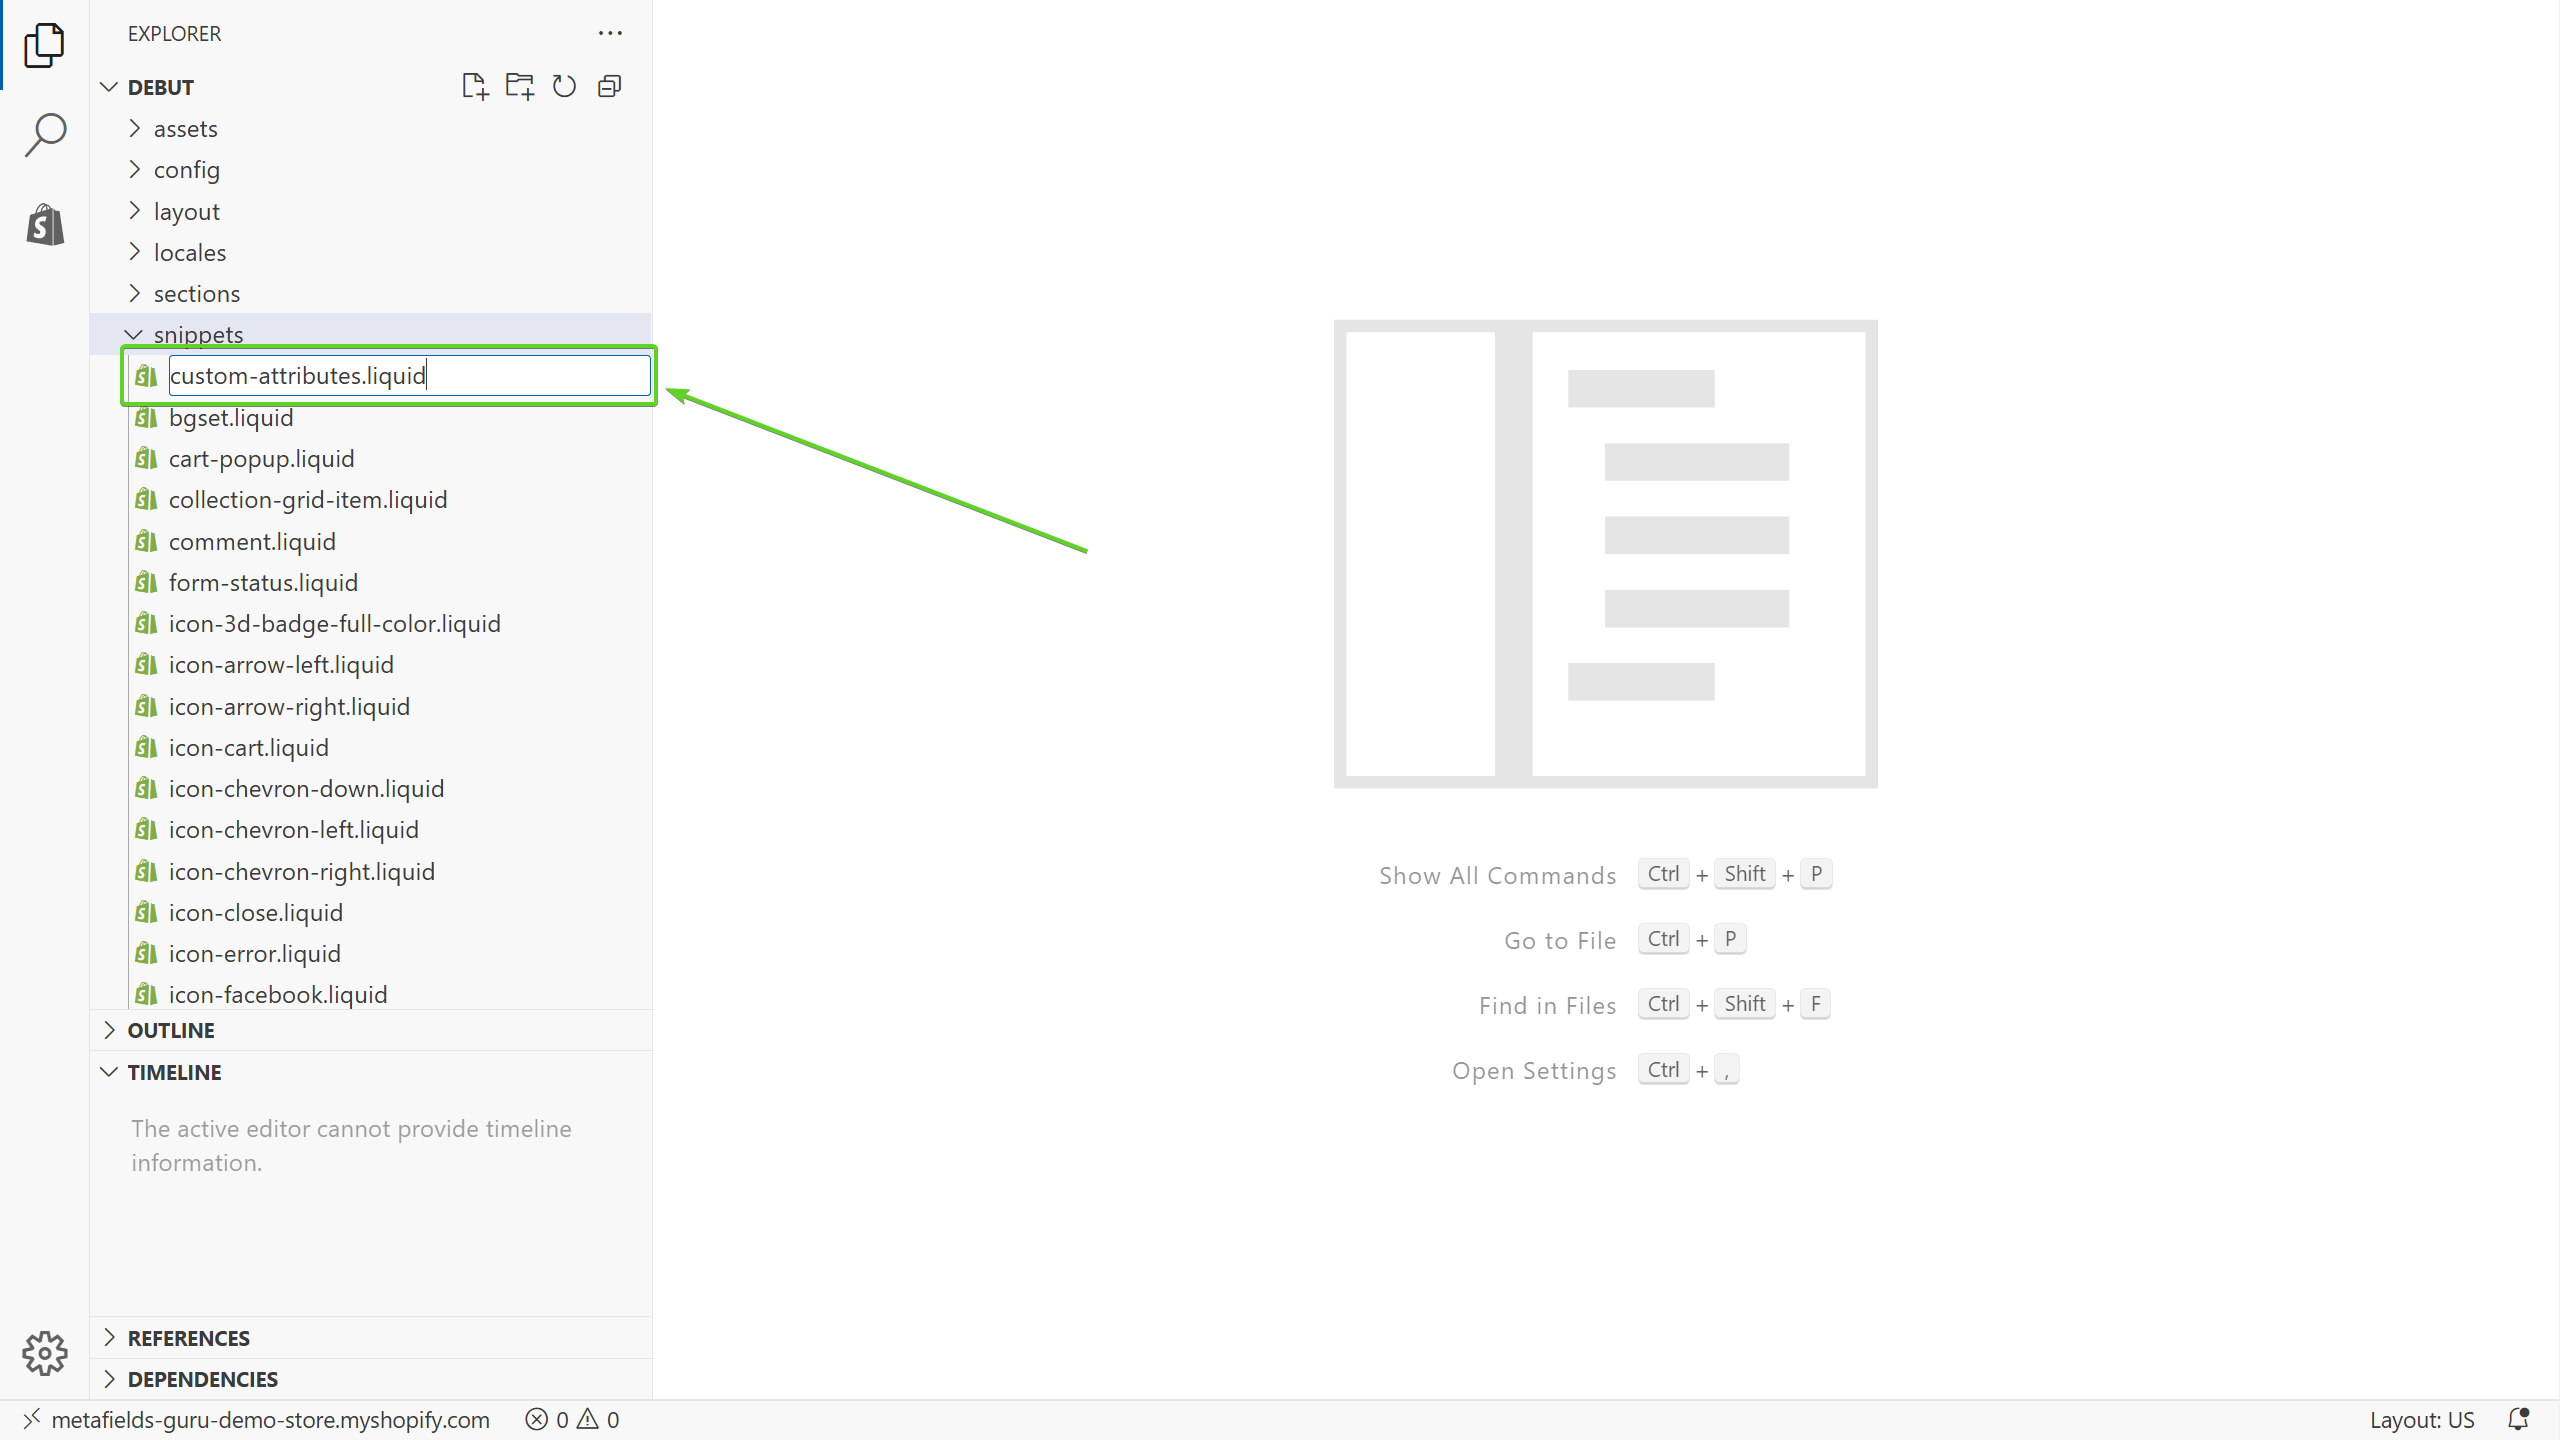
- On the left side, click the snippets heading to access your Snippets. Once you get the list of snippets, click the New File... button.
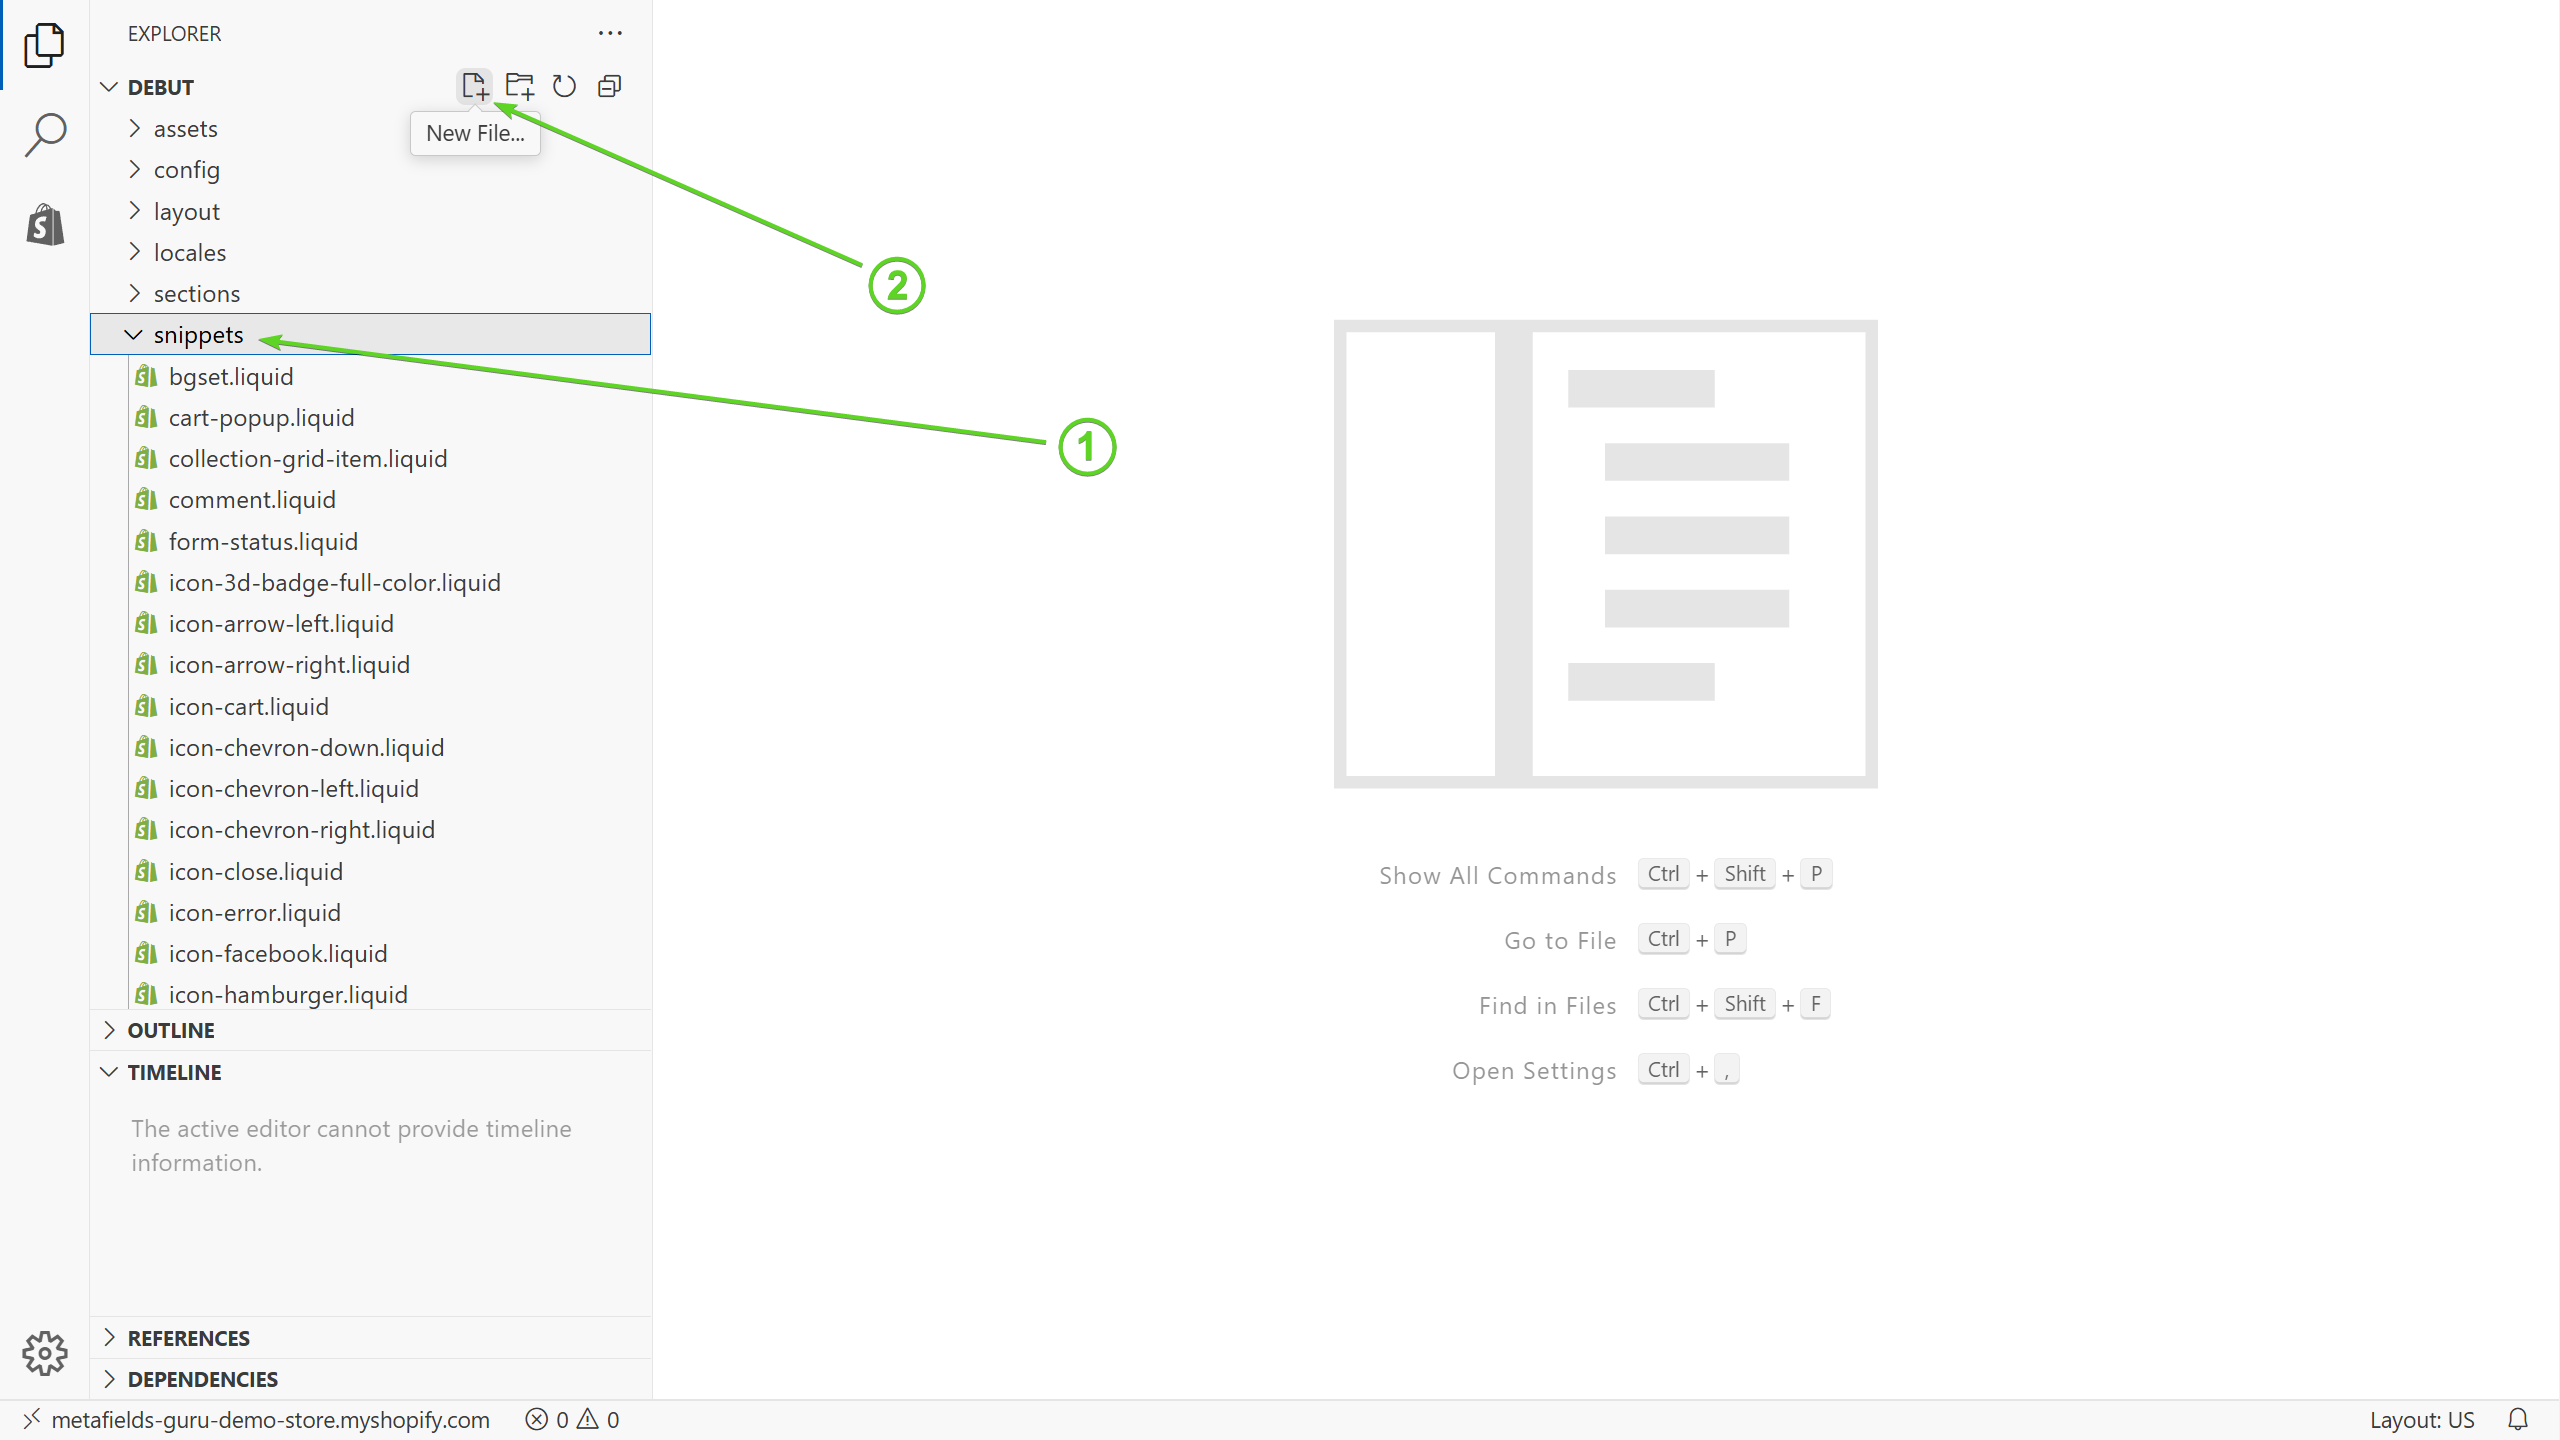
- Name your snippet
custom-attributes.liquid. Press Enter:
- Copy and paste the code listed below into your new
custom-attributes.liquidsnippet.
<div class="custom-attributes-wrapper product-single__description rte">
 {%assign custom_attributes = product.metafields.custom_attributes %}
  {%if custom_attributes.size > 0 %}
   <h3>Additional information:</h3>
     <ul>
       {% for field in custom_attributes %}
        {% assign attribute_code = field | first %}
        {% assign attribute_value = field | last %}
         <li class="custom-attribute-item"><span class="custom-attribute-name">{{ attribute_code }}</span>: <span class="custom-attribute-value">{{attribute_value}}</span> </li>
       {% endfor %}
     </ul>
  {%endif%}
  </div>
 <br/>
If you prefer creating a set of CSS rules from scratch rather than inheriting styling from the product description, you may want to change the class name to "custom-attributes-wrapper".
- Save the file.

Step 2. Include custom-attributes.liquid in your product-template.liquid
-
On the left side of the screen (the same section we used to find the Snippets), click the sections heading to access your Sections.
-
Under the Sections heading, locate and click
product-template.liquidto open your product template in Shopify built-in online code editor.
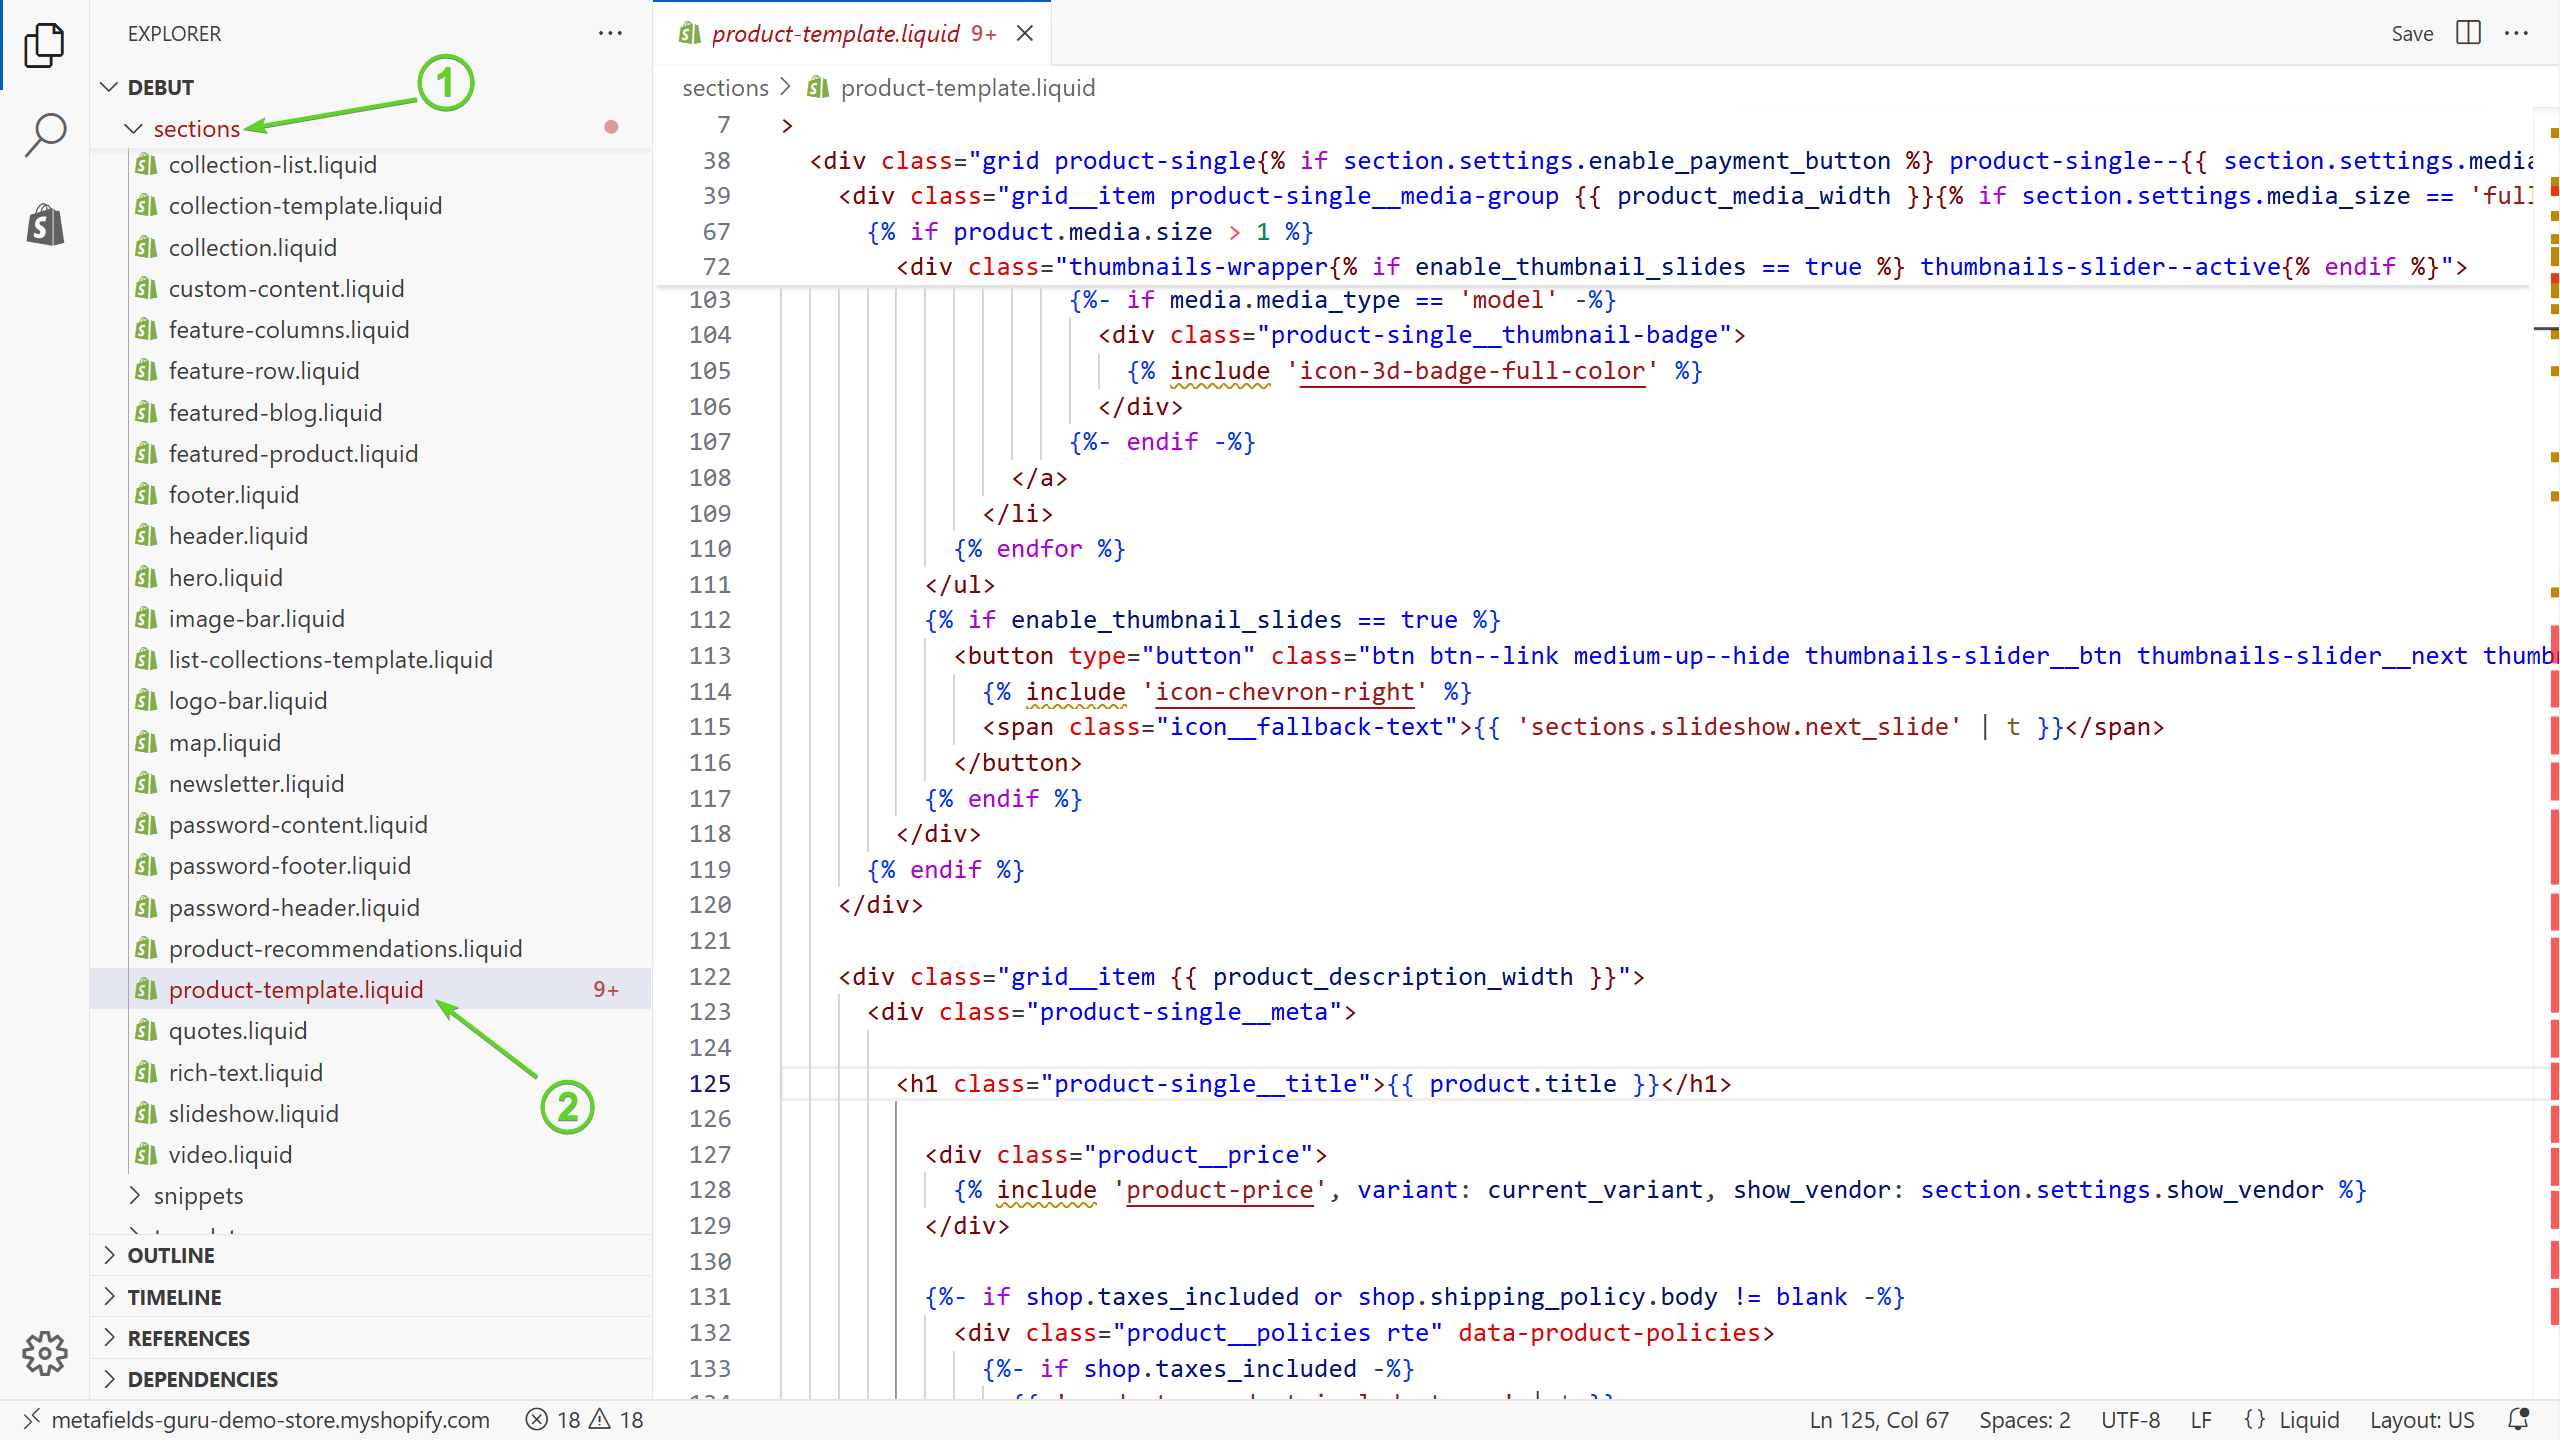
- Find the perfect spot to place your custom product attributes block within the product page. In this tutorial we’ll place it right under the product description. Find the following block of your product-template.liquid file:
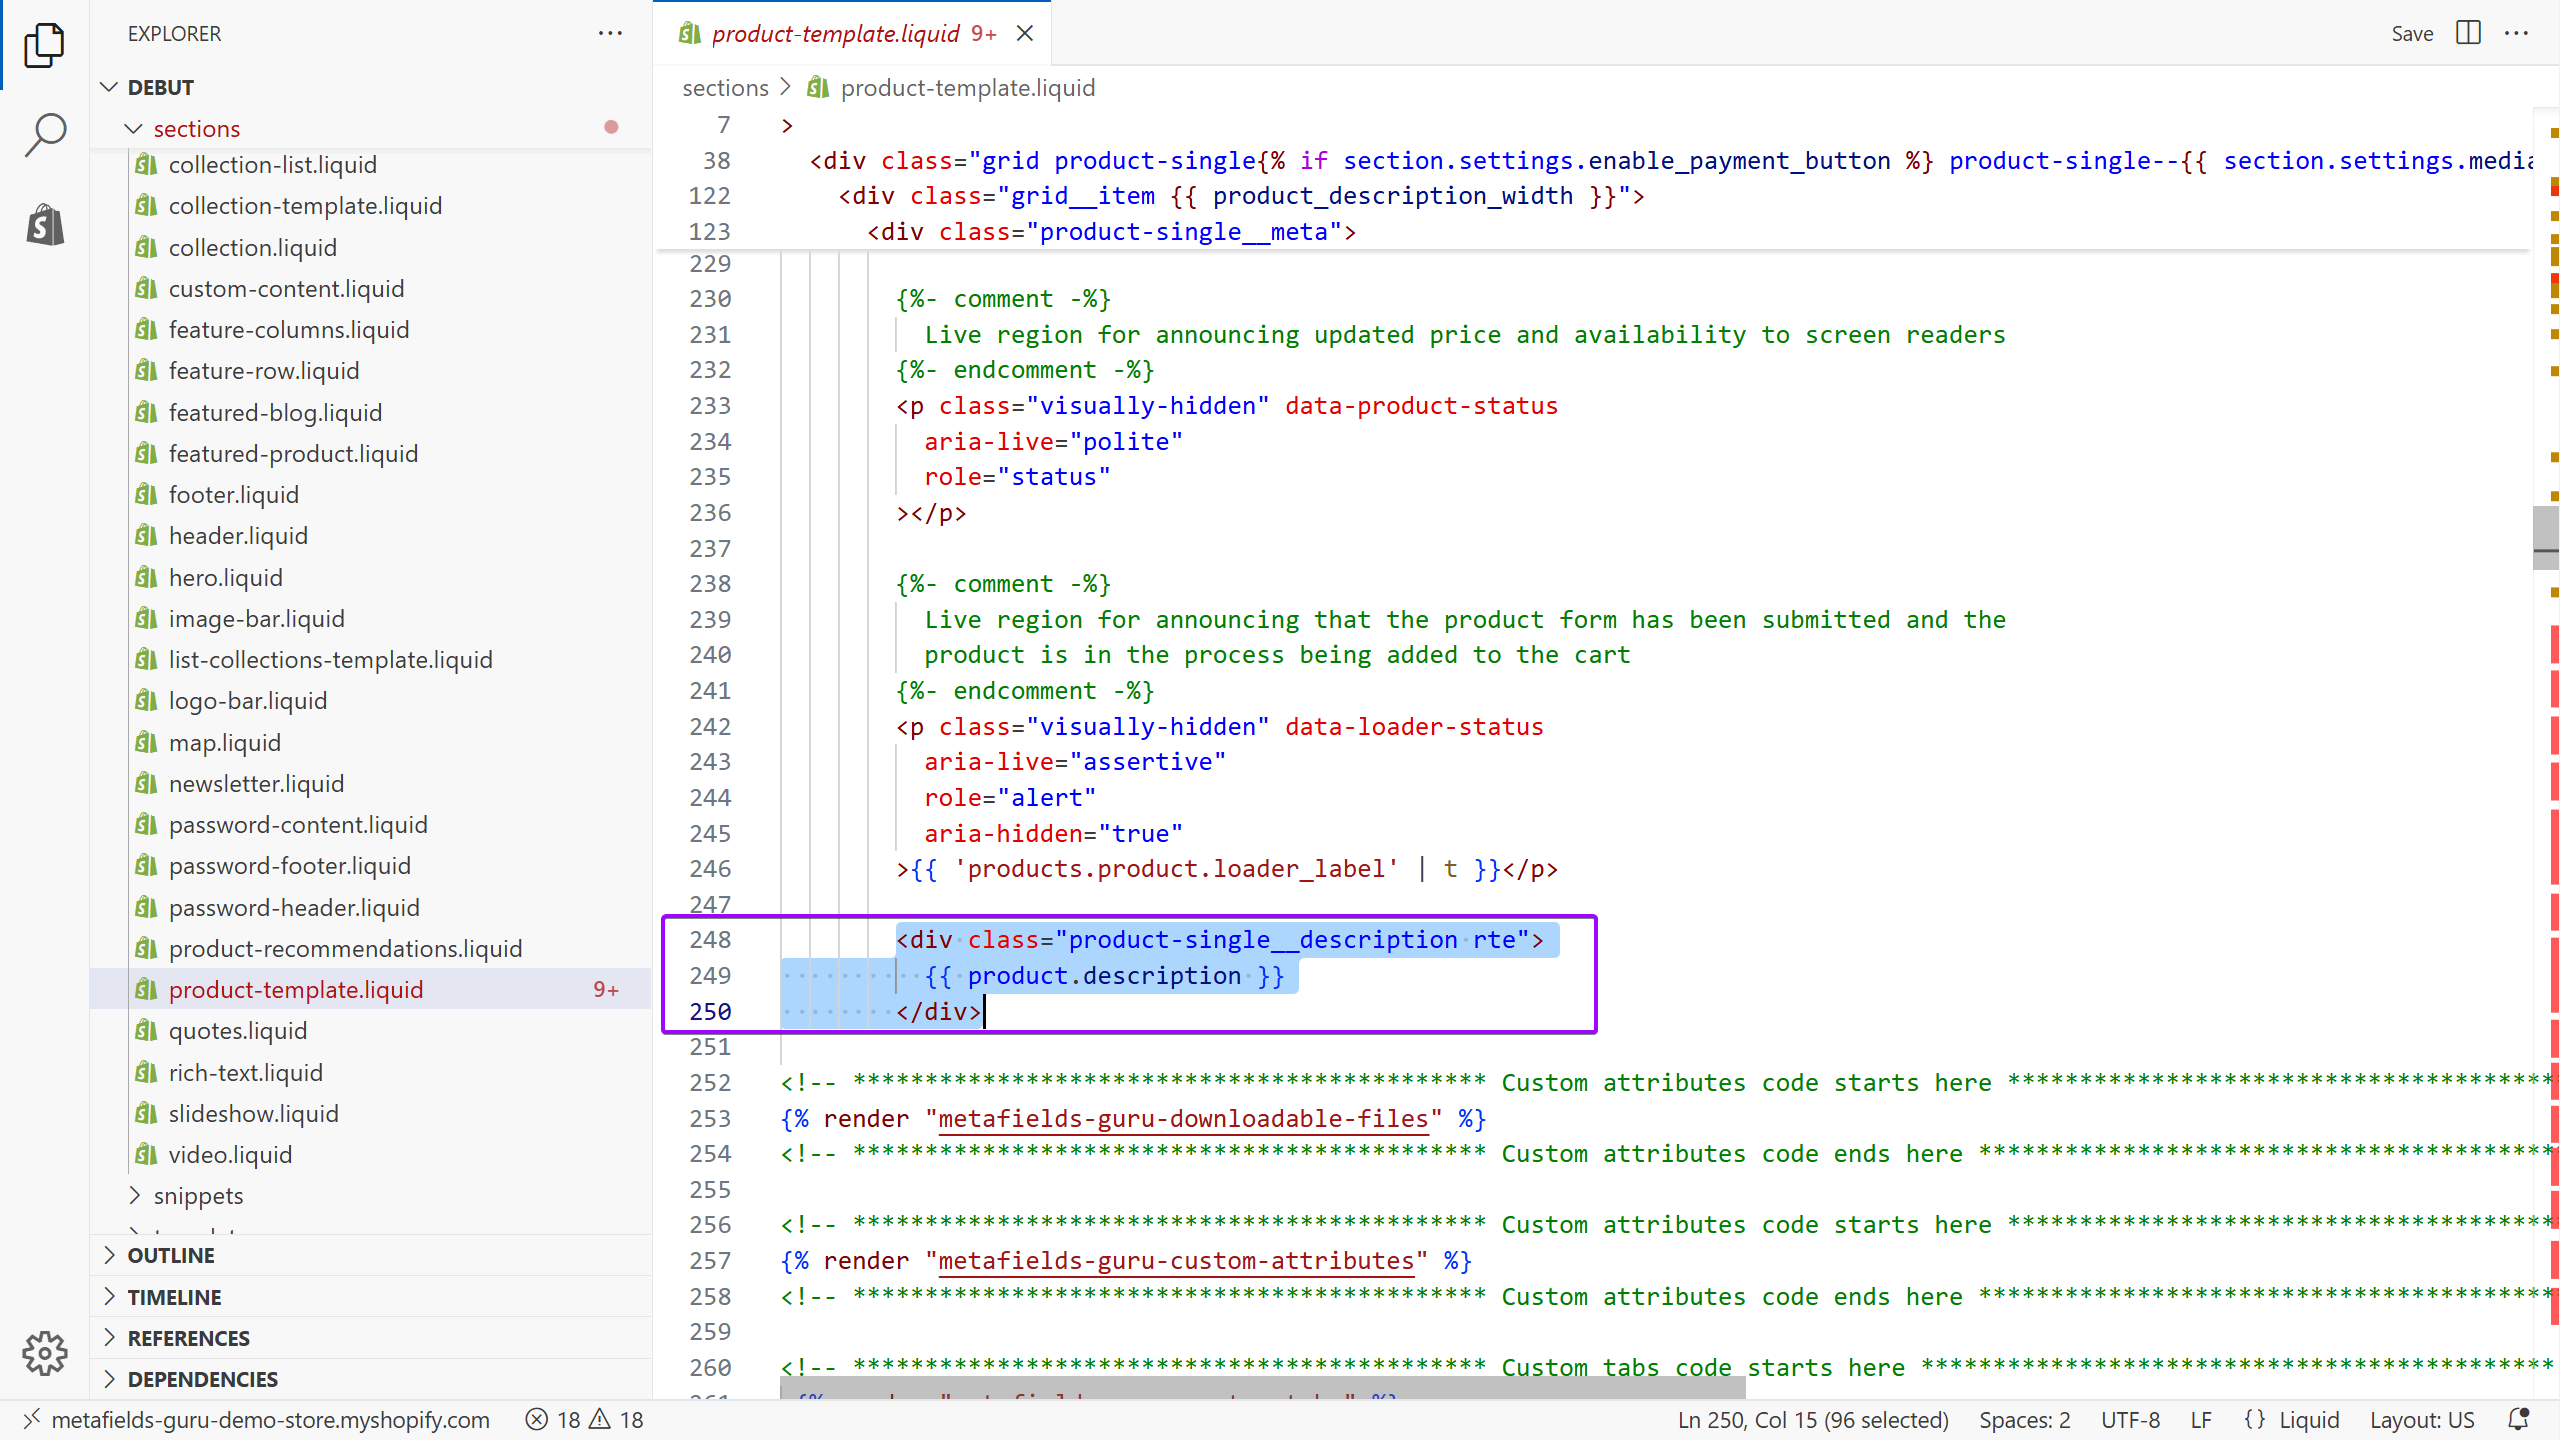
- copy and paste the code listed below right under the product description section:
{% render "custom-attributes" %}
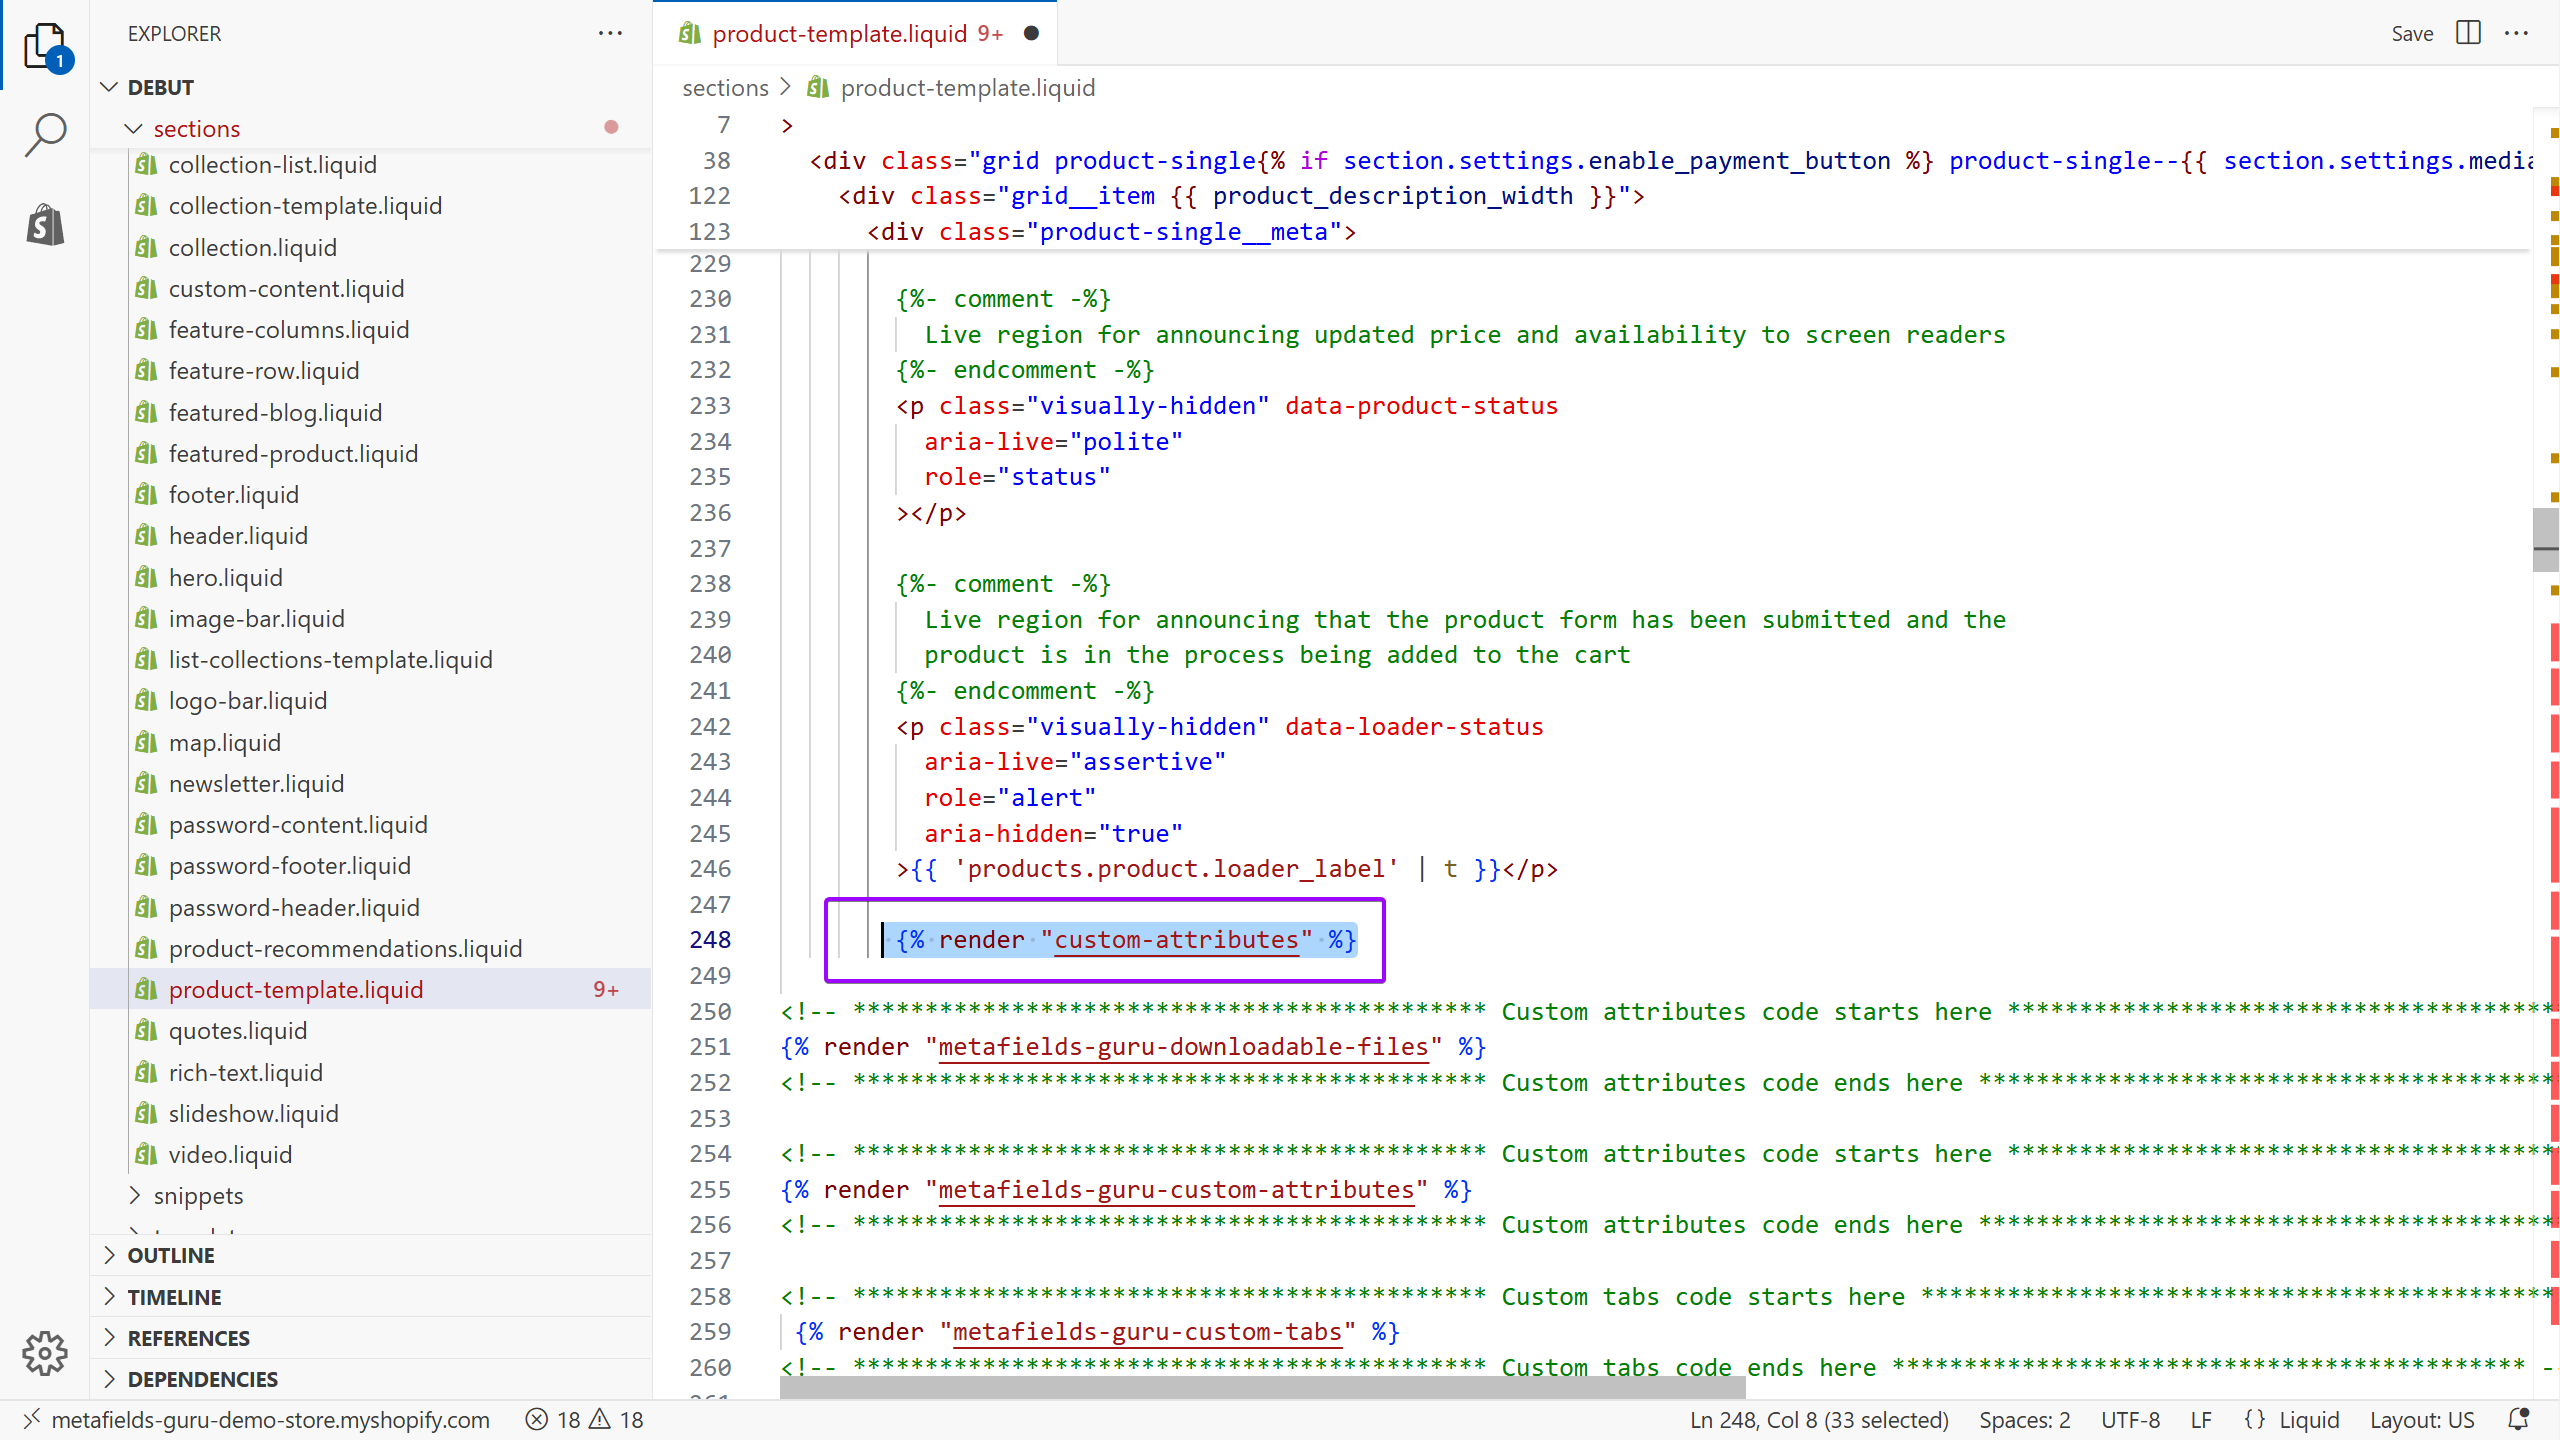
- Proudly hit the Save button:

Step 3. Add CSS styles (optional).
Now you may want to add some CSS rules to make the whole thing look pretty. Go to assets section and find your theme.scss.liquid file
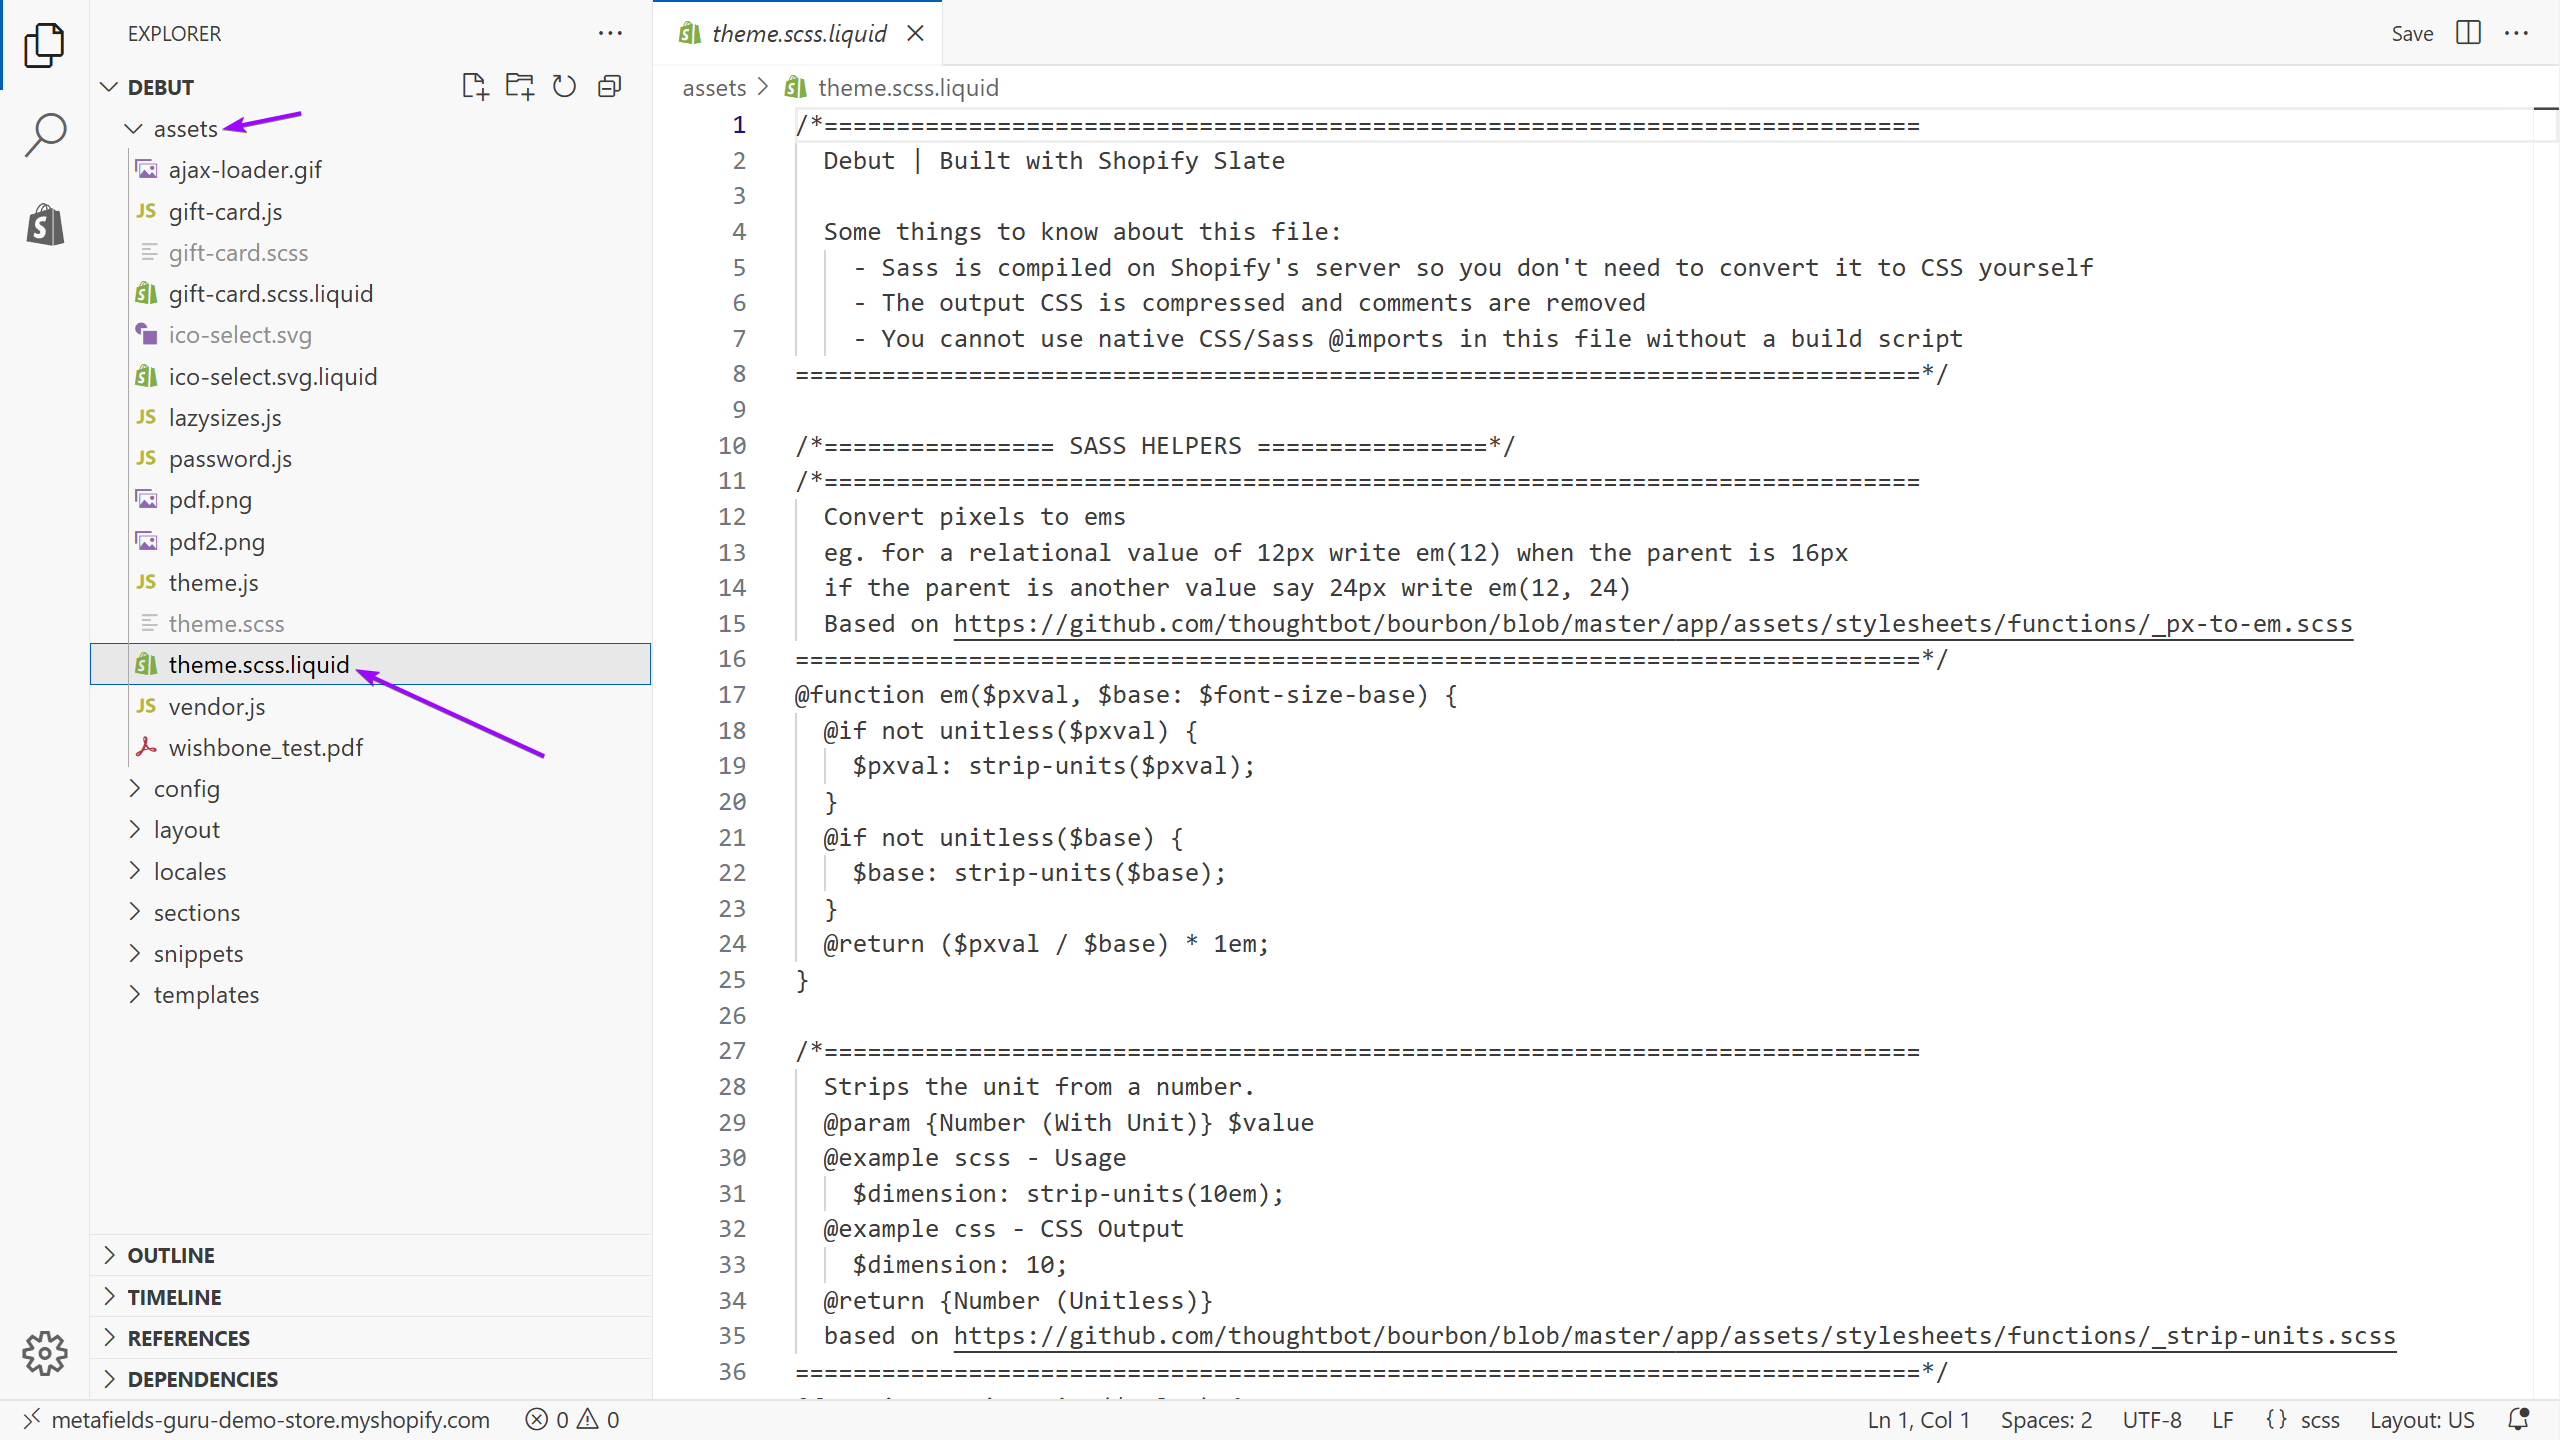
Open this file and add some really cool styling to the classes used in our tutorial: custom-attributes-wrapper , custom-attribute-item, custom-attribute-name and custom-attribute-value.
Have fun :)
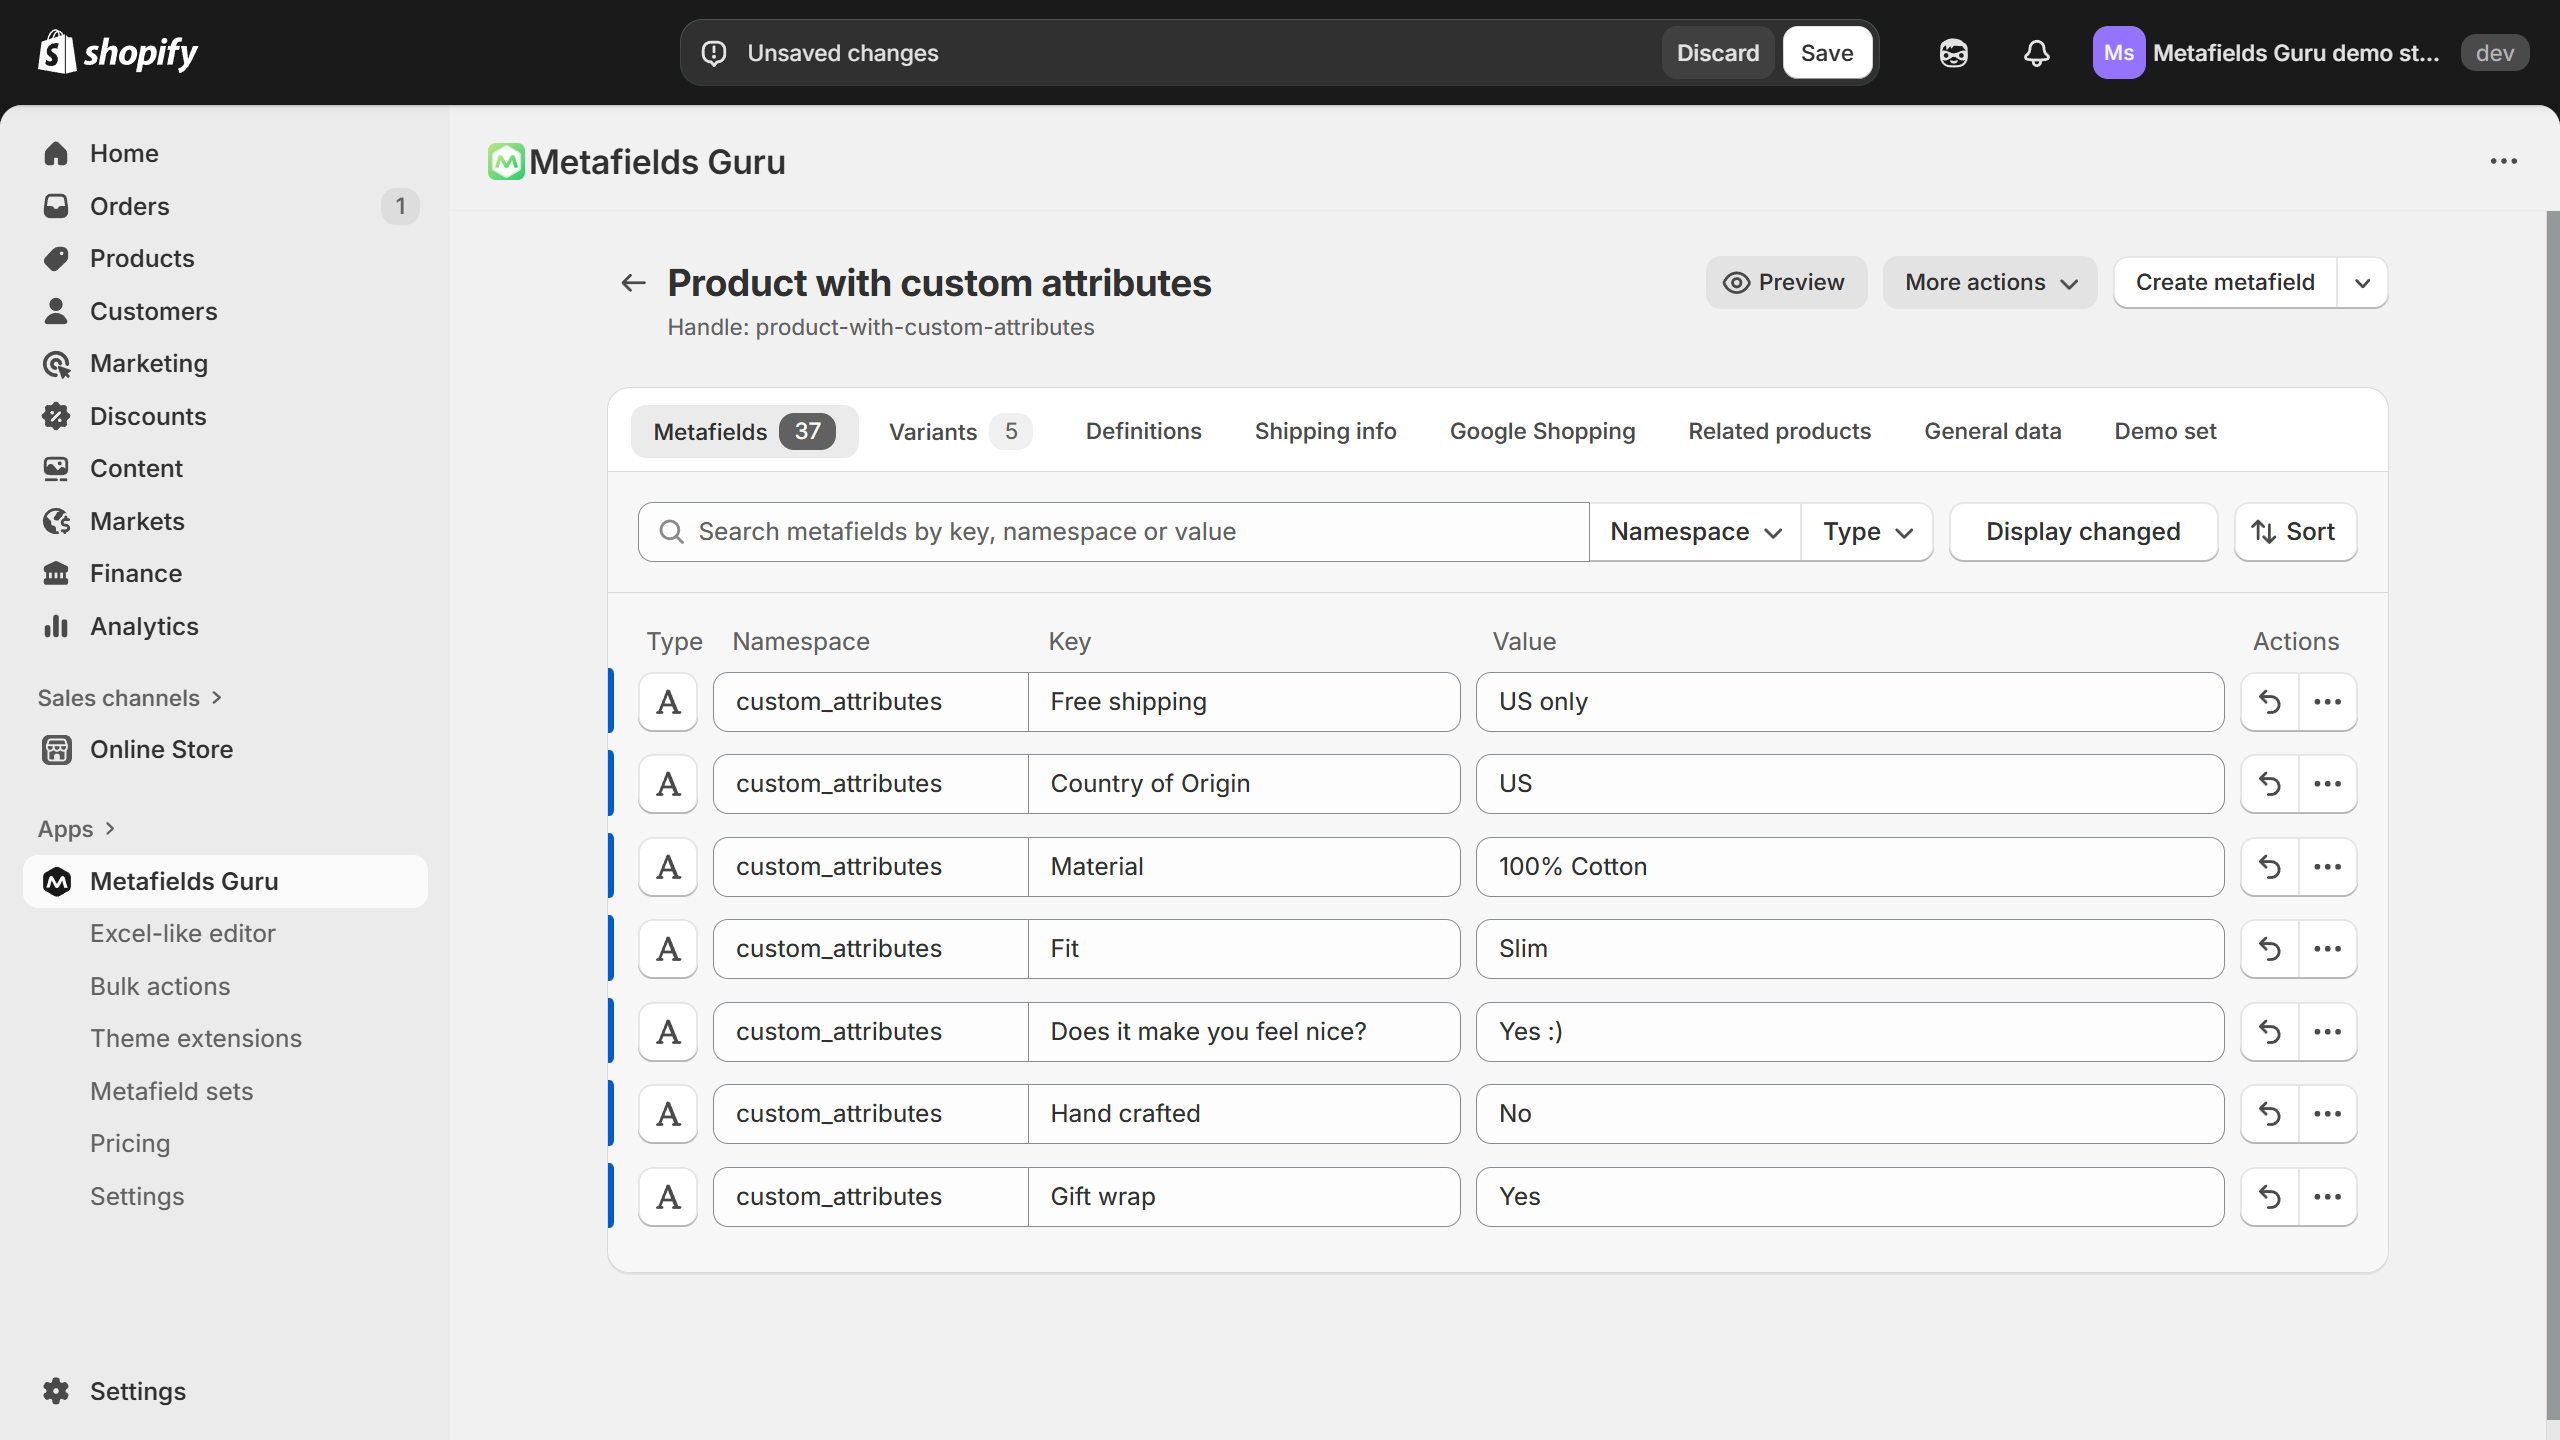
Step 4. Populate the metafields.
The custom functionality we implemented earlier is pretty easy to use and maintain. All you need to do to add a new custom attribute to your product is to create a new metafield within the namespace specified in your custom-attributes.liquid file (the default namespace used in this tutorial is custom_attributes). The key of the metafield will be used as the name of the custom field and the value of the metafield will be the value of your custom attribute. For example, this is what the metafields used to add the custom attributes to our demo product look like "under the hood":